In this article, we will see step by step instruction on working of Tab Bar Controller, UIWebView and Activity Indicator by loading couple of web pages using UIWebView in two different Tabs.
Tab Bar Controller
Tab Bar Controller is used for organising list of View Controllers by having seperate tabs for each View Controller. Check out the Apple Documentation for more information.
UIWebView
When you want to allow users to browse website then you can use UIWebView to load those pages. These WebViews needs to be placed inside a container such as UIViewController. Check out Apple Documentation for more information on UIWebView.
Project Setup
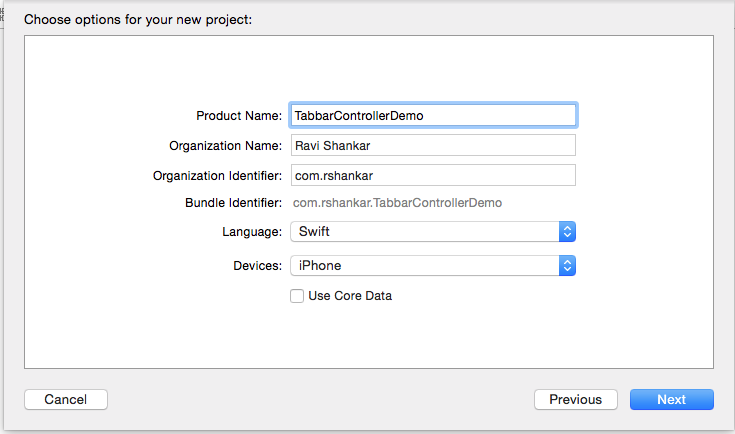
Create a new project by selecting Single View Application as project template. You can also choose Tabbed Application but in this demo we will see how to embed a ViewController inside a Tab Bar Controller.

Enter the project details and select the language as Swift.
Embed View Controller inside Tab Bar Controller
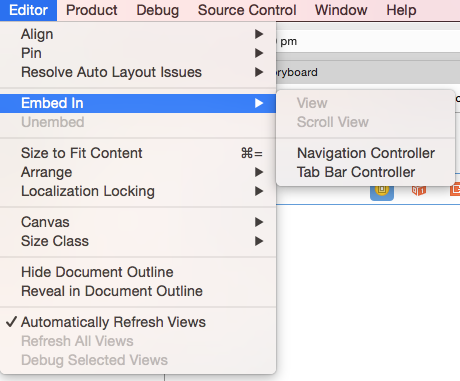
Navigate to Main.storyboard in Project Navigator and select View Controller. Now to embed this View Controller inside a Tab bar Controller, click Editor -> Embed In -> Tab Bar Controller
The Interface builder should now display View Controller and Tab Bar Controller as shown below.

Add Second View Controller
Now let us see how to add another tab by setting relationship between second View Controller and Tab Bar Controller. Drag and drop UIViewController from Object library to Interface builder.
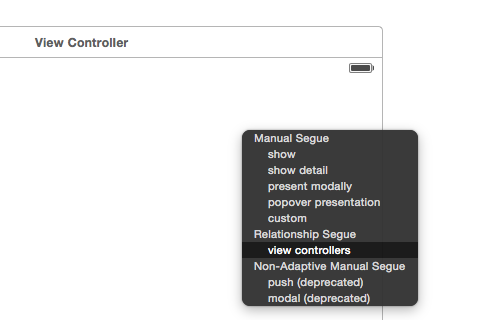
Control + Drag from Tab Bar Controller to UIViewController and select view controllers under Relationship Segue. This should add second tab bar item pointing the second View Controller.
Add UIWebView and Activity Indicator View
We are not using Auto Layout or Size Classes for this demo, so disable these features using the option available under File Inspector.

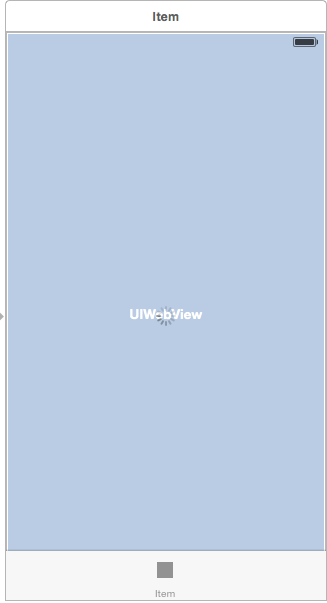
Drag and drop UIWebView from object libary to both the View Controllers. Make sure it is aligned centrally to View Controller and covers the entire View Controller area. Similarly add Activity Indicator View from object libary to top of UIWebView and align to the Centre both vertically and horizontally.
Edit Tab Bar Items
The Tab Bar Controller display two tab bar items which are linked to each View Controller. Add required images for each Tab bar items to the Images.xcassets (Download the images from GitHub project).
To provide a name and image for Tab Bar items, select the item in the corresponding View Controller and enter the details in Attributes Inspector. For the first View Controller, the name and image are set as shown below.

repeat the same for the second View Controller as well.

Link class with UIViewController
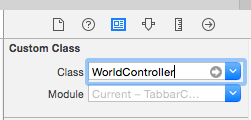
The project comes with a default ViewController.swift file which is mapped with the first View Controller. Let us give a proper name to this controller. Unfortnately Xcode Refactor option still does not work for Swift (Xcode version 6.4). Manually rename the file to WorldViewController.swift and also make the corresponding name change in Class.
class WorldController: UIViewController {
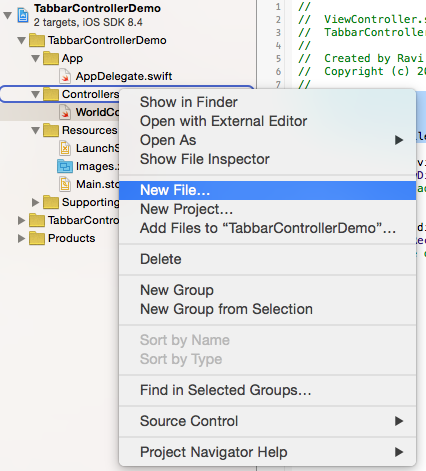
Add a second view controller class by right clicking the project, select New File option.
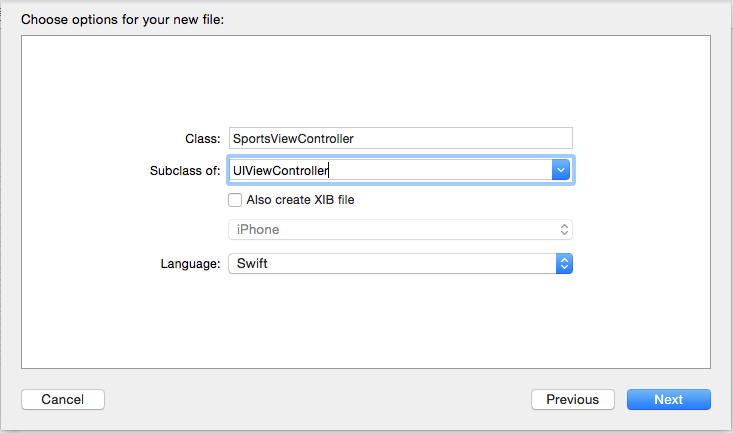
In the choose template screen, select Cocoa Touch Class and provide name as SportsViewController making it a subclass of UIViewController.
Create IBOutelts for UIWebView and Activity Indicator View
Using Assistant Editor, navigate to Main.storyboard in the second window. In the Identity Inspector, set the class name for both ViewControllers to WorldViewController and SportsViewController.

Drag and drop UIWebView from WorldViewController (Interface builder) to WorldViewController.swift to create IBOutlet. Do the same for Activity Indicator View as well.
@IBOutlet weak var webView: UIWebView!

@IBOutlet weak var activityIndicator: UIActivityIndicatorView!
Repeat the same exercise for SportsViewController and create corresponding IBOutlets.
Code Implementation
Navigate to WorldViewController.swift file and add the following code snippet in ViewDidLoad function.
let url = NSURL(string: "http://edition.cnn.com/world")
let urlRequest = NSURLRequest(URL: url!)
webView.loadRequest(urlRequest)

activityIndicator.startAnimating()
activityIndicator.hidesWhenStopped = true
The first three lines of the code create a NSURLRequest and the object is passed to UIWebView loadRequest function. The last two lines starts the Activity Indicator View and sets the property to hide the indicator when it is stopped animating.
We need to tell the Activity Indicator when the page has finished loading. This can be done by implementing UIWebViewDelegate’s webViewDidFinishLoad function.
Add the following piece of code to make the View Controller as a delegate for webView.
class WorldController: UIViewController, UIWebViewDelegate {and in the viewDidLoad function add webView.delegate = self. This would ensure that the View Contorller can handle any WebView delegate related calls.
Now implement the webViewDidFinishLoad function and stop the animation of Activity Indicator View when the webview has finished loading the page.
//MARK:- WebView Delegate method

    func webViewDidFinishLoad(webView: UIWebView) {
        activityIndicator.stopAnimating()
    }
Repeat the above code implementation for SportsViewController excepy by chaning the URL string.
class SportsViewController: UIViewController, UIWebViewDelegate {
    @IBOutlet var webView: UIWebView!
    @IBOutlet var activityIndicator: UIActivityIndicatorView!

    override func viewDidLoad() {
        super.viewDidLoad()

        let url = NSURL(string: "http://edition.cnn.com/sport")
        let urlRequest = NSURLRequest(URL: url!)
        webView.loadRequest(urlRequest)

        activityIndicator.startAnimating()
        activityIndicator.hidesWhenStopped = true

        webView.delegate = self
    }

    override func didReceiveMemoryWarning() {
        super.didReceiveMemoryWarning()
        // Dispose of any resources that can be recreated.
    }

    //MARK:- UIWebView Delegate methods
    func webViewDidFinishLoad(webView: UIWebView) {
        activityIndicator.stopAnimating()
    }

}
When you finally build and run the project, you should see the follwing on iOS simulator.

Download the source code from here