
Auto Layout in iOS
Using Auto Layout feature developers can align UI controls for different devices, screen sizes and orientation. This reduces the code to be maintained and makes life easy for the developers. Auto Layout solves UI design issues by creating relationship between the UI elements. This follows constraint based layout system where you can define contraints for each UI elements. Let us see some basics of Auto Layout by looking at four different scenarios
The objective of this article is to provide details on the following
- Different ways to add constraints to UI elements.
- How to centre align a control to both vertically and horizantally to container.
- Arrange three controls in single column with centre aligned horizontally to the container.
- Design simple login form by embeding the controls inside view
- Design a form where the width of controls gets adjusted based on device orientation.
- Clear and Edit constraints.
- Pinning constraint and Updating frames
Center Align image Vertical and Horizontal to the container
For this demo, let us start with a single view application project. Drag and drop an UIImageView from object libary on to View Controller. Copy an image to your project and set that image to UIImageView using Attributes Inspector (Download the image from GitHub project).
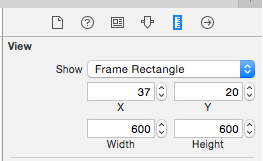
You might be familiar with Size Inspector under Xcode’s Utilies Pane. This helps us to enter the height, width, x and y position for any UI elements.
Another alternate way to enter the size and postion for elements by adding constraints using the Auto Layout option which is available at the bottom of the Interface builder.
Select the Click the Pin option, enter value for Width and Height as 300 then Add these 2 Constraints.

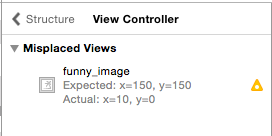
After applying the constraint, you should notice orange dashed line indicating that your control is out of position. Let us update the frame afer applying all the required constraints.
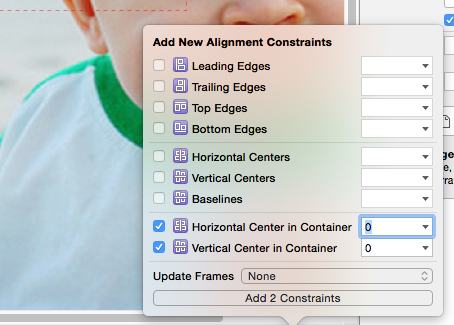
Click Align option (first option) and select Horizontal and Vertical Center in Container then Add these 2 Constraints.
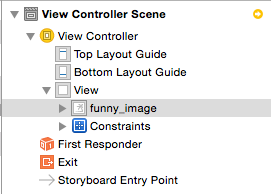
If the ImageView on the ViewController is in misplaced position, the document outline will show an yellow color indication mark at top right hand corner. You can select that icon to find more details about the issue.
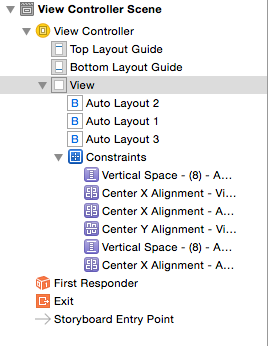
Document Outline
Document Outline in the Storyboard lists down the installed controls for a scene. Also you can the list of constraints added for these controls. If you do not need any constraint then you select it and delete them in Document Outline.
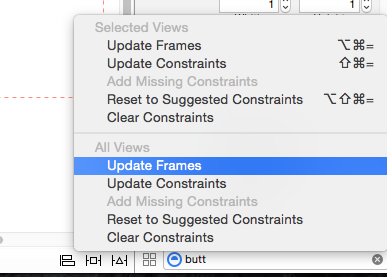
The missplaced views can be fixed by selecting Update Frames option under Resolve Auto Layout Issues (Auto Layout option with a triangle).
Preview User Interface changes
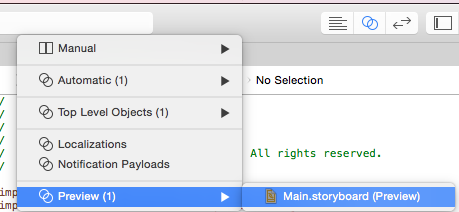
Now you can preview user interface changes on various device by using the Preview option. Click the icon for showing Assistant Editor window. Navigate to Preview and select Main.storyboard option as shown in the below screenshot.

You can use + sign to preview the screen in a specific device and also use rotate screen option to preview the changes in different screen orientation.
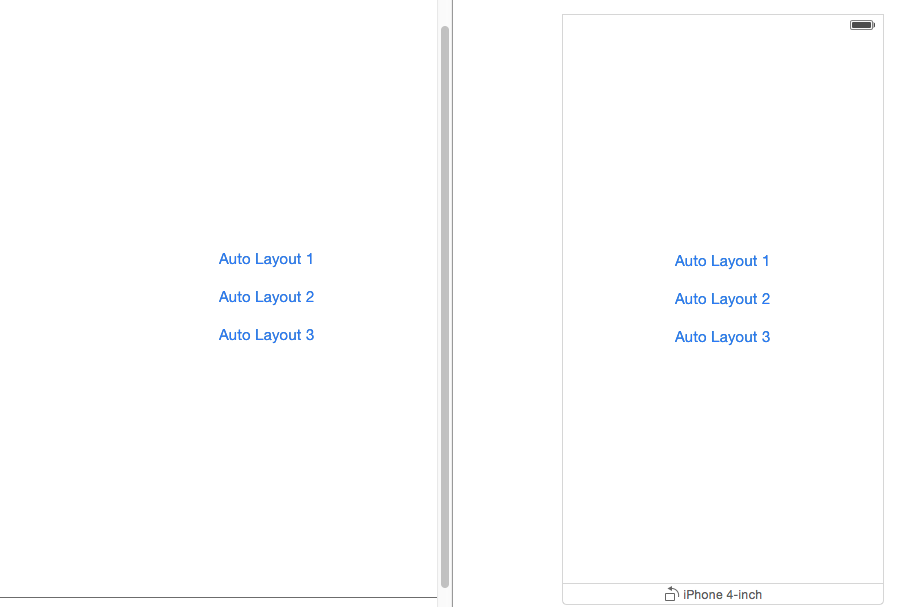
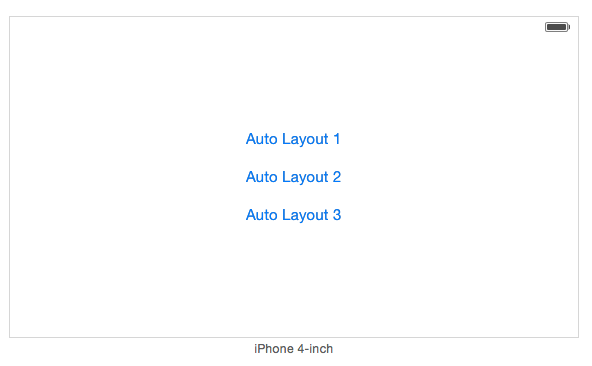
Arrange three Buttons in single column
In the next demo, we wil try to arrange three buttons aligned horizontally center to View and in a single column. Add a View Controller to the storyboard then drag drop three buttons on the View Controller. Though we have used the guidelines to align these buttons they don’t look the same when you preview them.

Now let us see how to fix these UI issues by adding constraints.
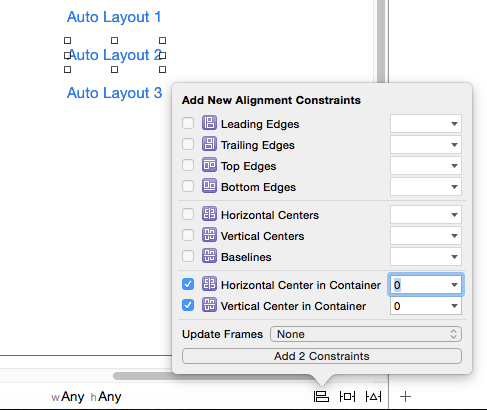
First select the Button with caption as Auto Layout 2 and make it Horizontal and Vertical Center in Container then Add these two constraints. This would make sure the Auto Layout 2 button is aligned center to the View both vertically and horizontally.
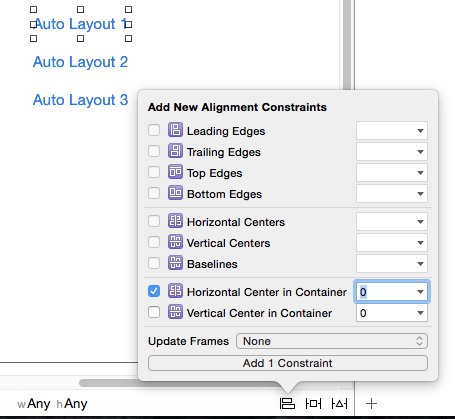
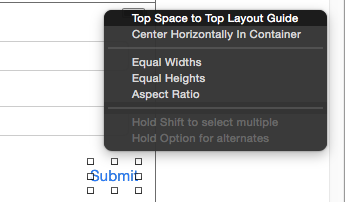
Select the button with caption as Auto Layout 1. Use the Aign option and add Horizontal Center in Container constraint.
Now you need to specify the Centre X and Verical Spacing constraint for this button. This can be done by control dragging from Auto Layout 1 button to Auto Layout 2 and you will be presented with the following option.
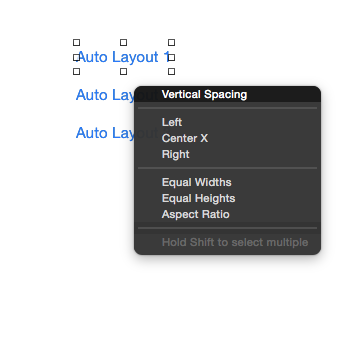
Select Vertical Spacing to position the control at constant distance from Auto Layout 2. Repeat the same control drag from Auto Layout 1 and Auto Layout 2 and this time choose Centre X.
Now repeat the above steps for Auto Layout 3 with Auto Layout 2 i.e add Centre X and Vertical Spacing constraints.
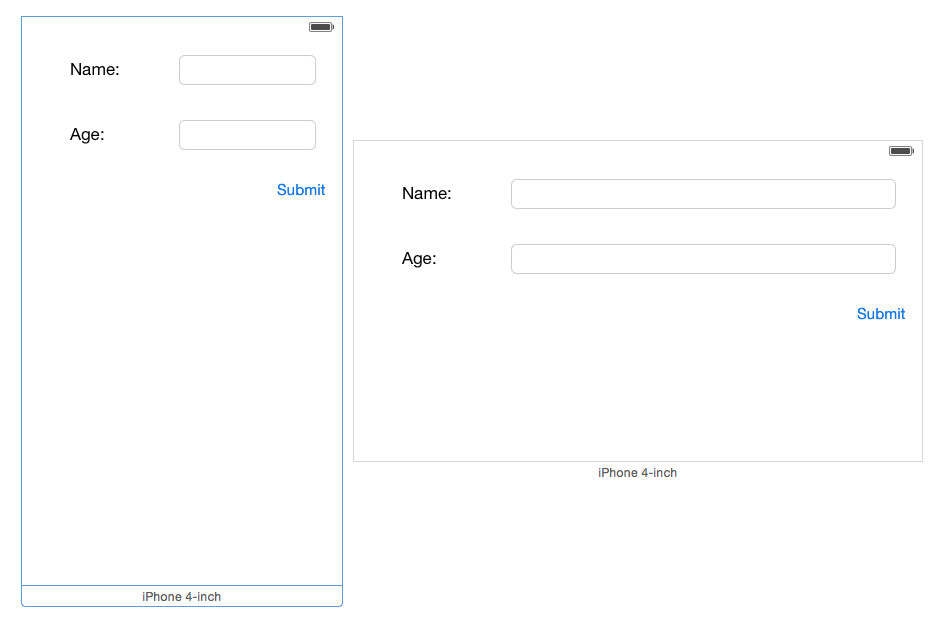
Scenario 3:- Adjust control width based on screen orientation
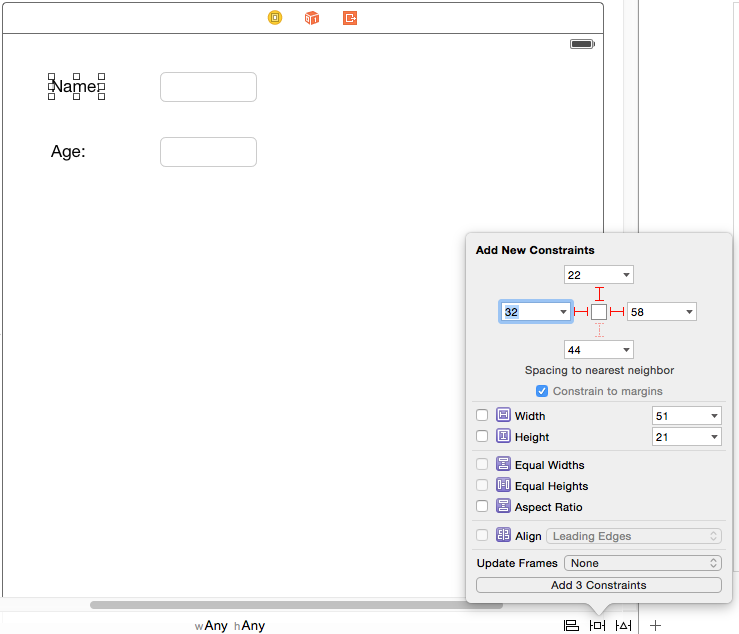
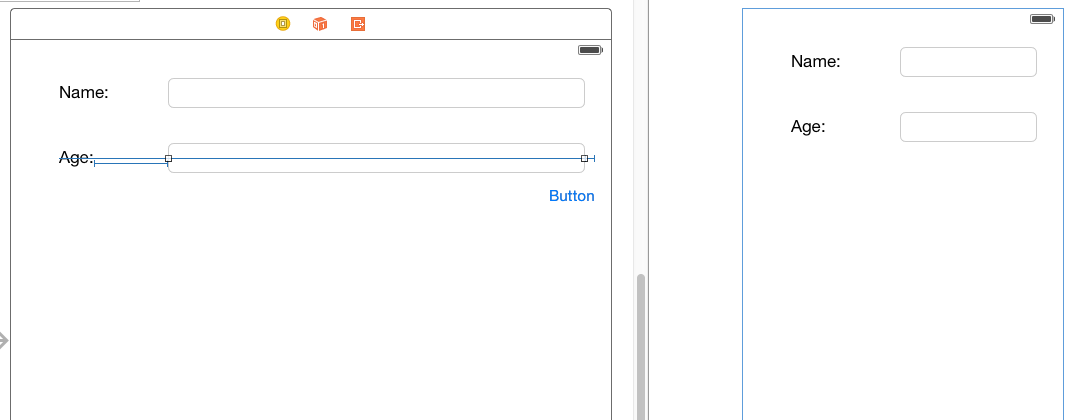
This scenario explains how to add constraints so that controls width increases or decreases based on the screen size. For example in the below screenshots, the width for textfields provided for entering name and Age gets adjusted based on screen orientation
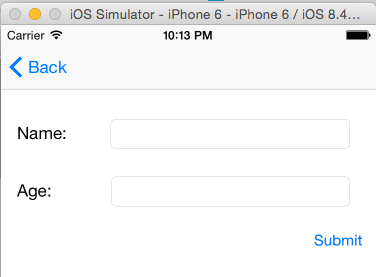
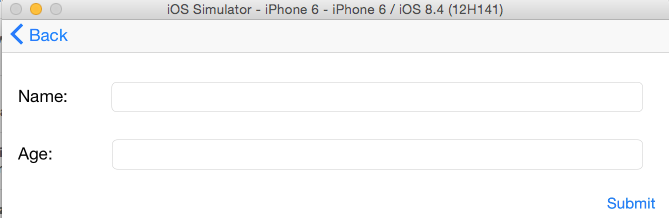
Add a new View Controller on to Storyboard then add 2 labels and 2 textfields and a button. Provide the caption for both labels as Name, Age and Submit (button) respectively. We need to add constraints to labels so that their width and position are fixed at the specified location. And for both the textfields, constraints have to be added to trailing edge so that width increases or decreases based on the orientation
Add three constraints to the label with caption as Name using the pin option as shown in the below screenshot.
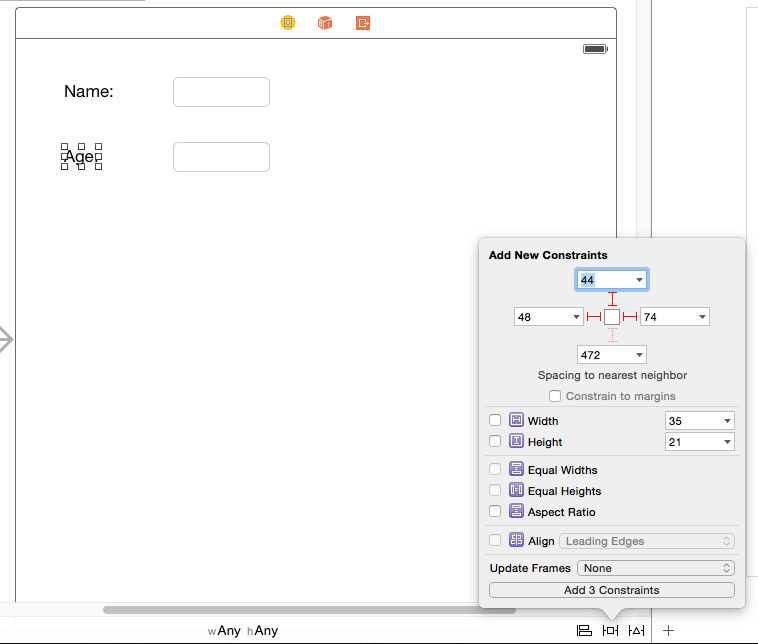
Repeat the same for label with caption as Age
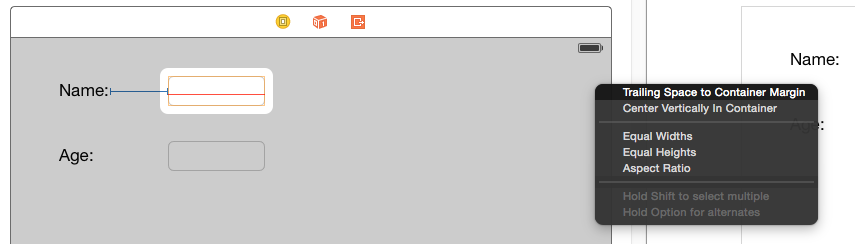
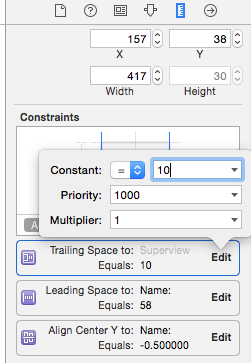
Select the textfield adjacent to Name label, control drag from textfield to the container then select Trailing Space to Container Margin.
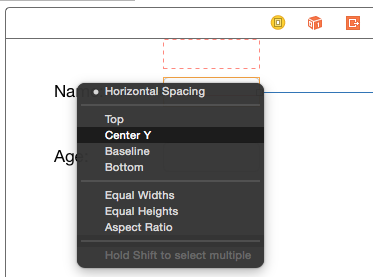
Need to align the textfield with the label, control drag from text field to name label and select Centre Y from the list of constraints.
Keeping the textField selected, navigate to Size Inspector (Utilities Pane) and cick Edit on Trailing Space constraint. Set the value for the constant as 10 as we want to maintain the space between textfield and container to 10 in both landscape and portrait mode.
Repeat the above steps done for Age textfields as well.
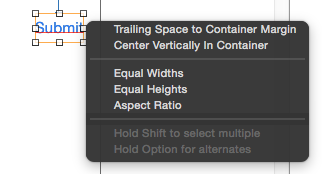
Finally we need to add two constraints for the Submit button to make sure it is aligned on the right hand side at certain distance from the Top Layout. Control drag from button to top of the container and select Top Space to Top Layout Guide.
Again repeat the above step by this time to side of the container and select Trailing Space to Container Margin.
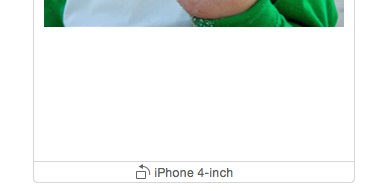
Now prevewing the screen in Portait and Landscape mode should look as shown below.
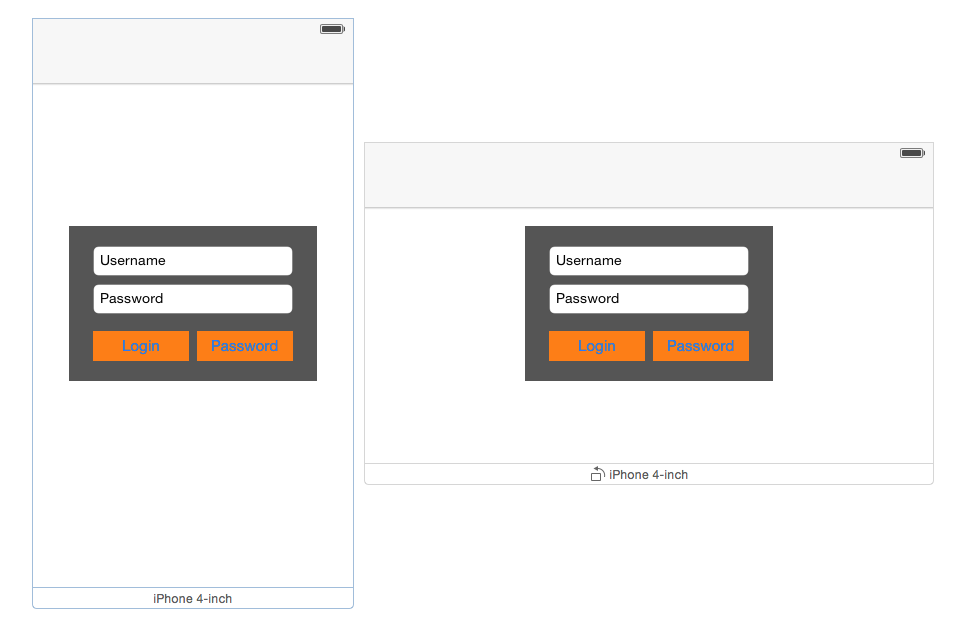
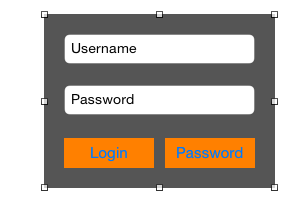
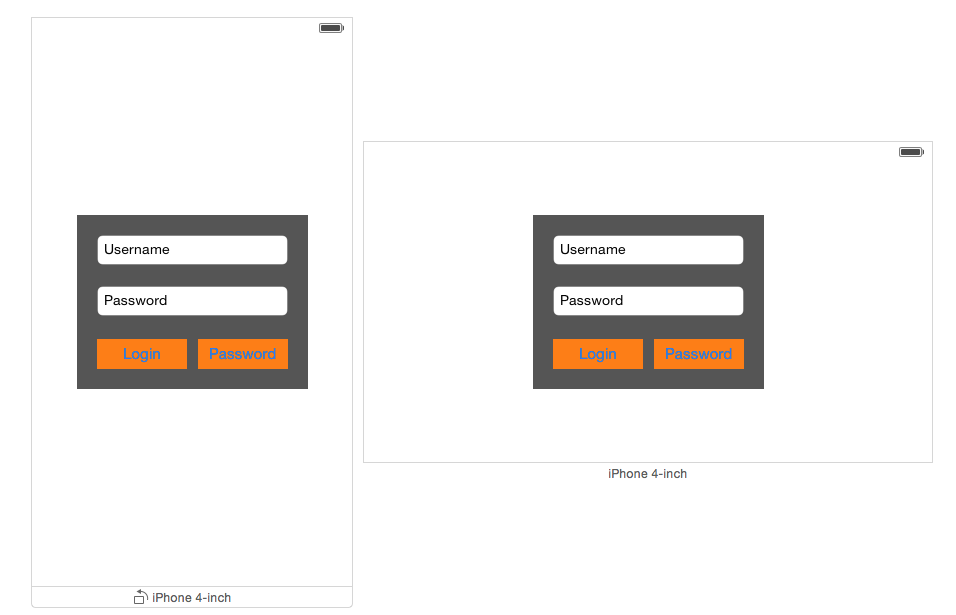
Scenario 4:- Apply constraints to Embedded View
In this demo, let us see how to embed controls within a view and apply constraints to the embedded View instead of applying to the individual constraints.
Note :- Button has been incorrect named as Password it needs to be Register. The source code has been updated with this name change.
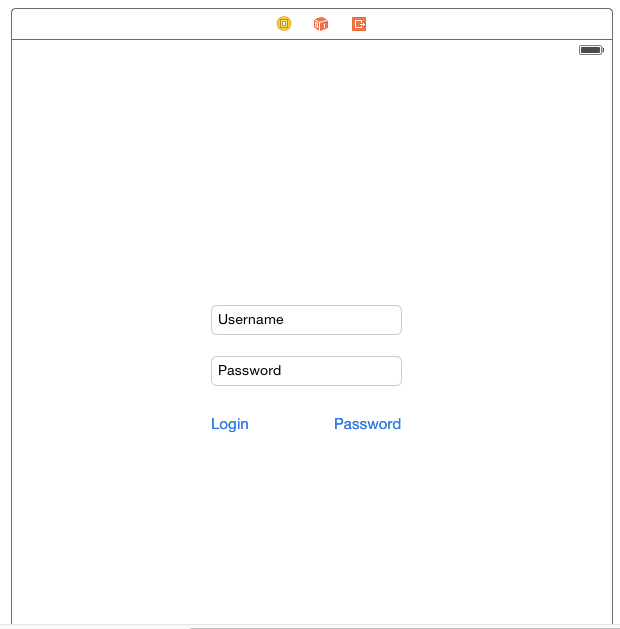
Add 2 textfields, 2 buttons and provide name and placeholder text as shown below.
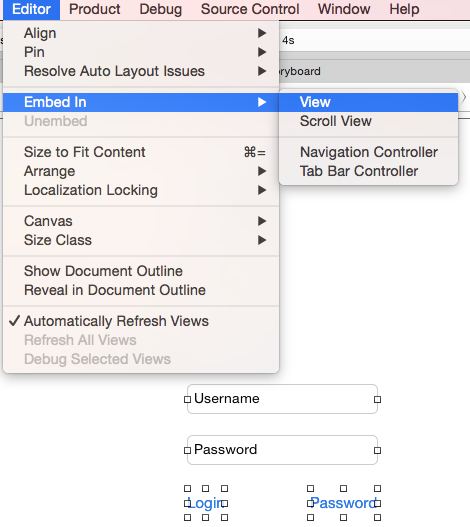
Select these controls and embed them inside a View by navigating to Editor menu -> Embed -> View
Now change the background colour of the View and buttons to dark gray and orange.
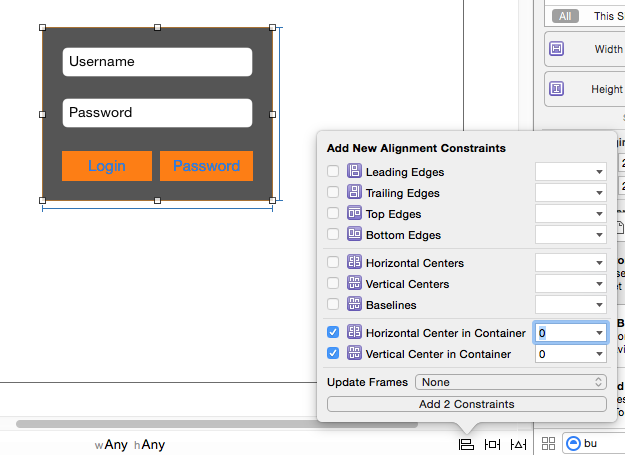
Select the Embedded View, click Align option and make the View centre align to both Horizontal and Vertical to the Container.
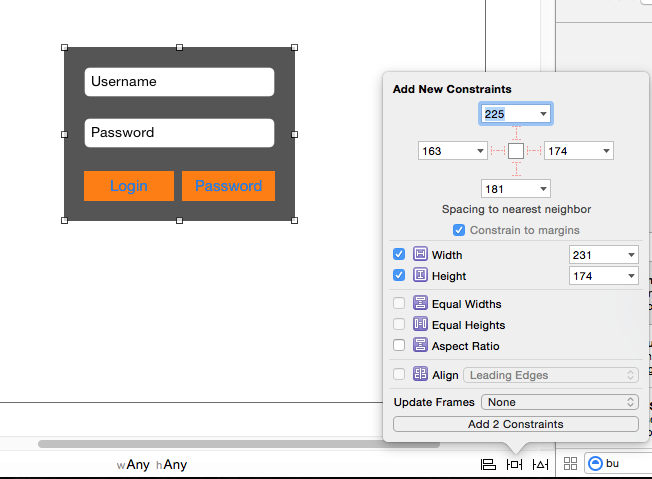
Also add the width and height constraints for the Embedded View keeping the current value.
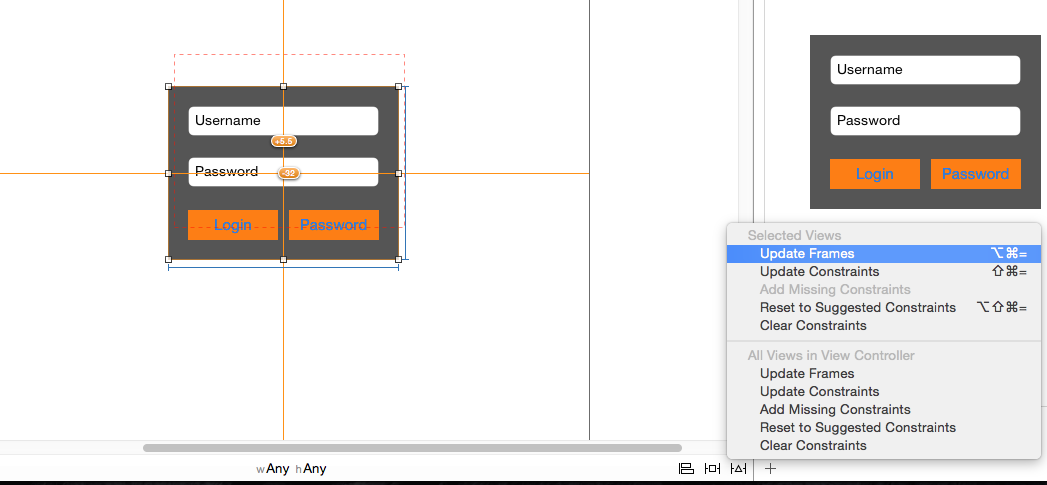
Now you might see a dashed orange colour line indicating the view is in misplaced position. You can fix this by selecting Update Frame under Resolve Auto Layout Issues option. Please make sure to select Update Frame option under Selected Views and not the container
Previewing the screen in both portrait and landscape should look as shown below
We have seen an introduction to Auto Layout using Storyboard. You can also add constraints via code using NSLayoutConstraint API or Visual Formatting language.
If you need any assistance in Auto Layout, check out our new iOS 9 Auto Layout Tutorials.
Download the source from GitHub