
In this iOS development tutorial, we will see how to write a blog feed Reader app in Swift Programming Language. For this demo, let us take the blog feed (https://rshankar.com/feed) from Learning Swift and iOS Development blog. This is a WordPress blog and the number of posts in the feed is set to 10 (This is configurable using WordPress Settings). For parsing this feed we will be using NSXMLParser and the parsed data will be displayed in a TableView. Then when the users taps on any post, the post URL will be displayed in a UIWebView.
Download source code from GitHub


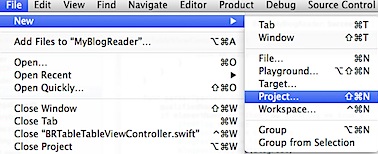
Click File menu, select New then Project from the sub menu.

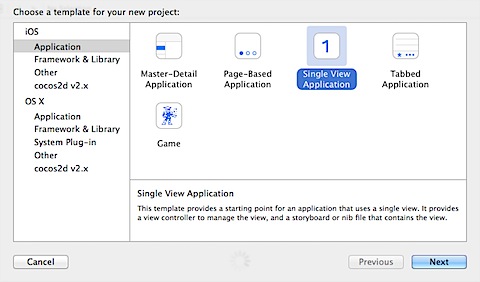
In the template screen, choose Single View Application and click Next.

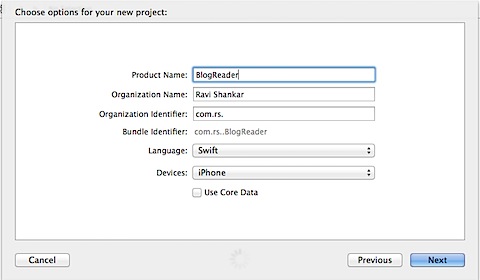
In the options screen, enter the Product name and select language as Swift. Then choose a folder and save this new Project.

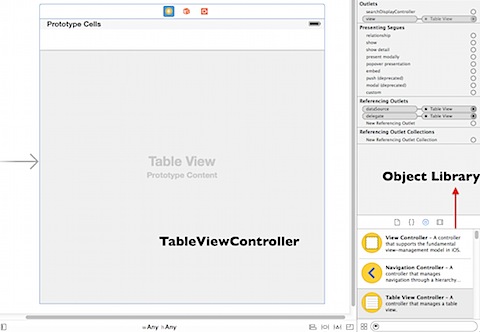
Add a new TableViewController
Navigate to Main.storyboard and delete the default ViewController. From the object library, drag and drop a TableViewController on to the Storyboard.

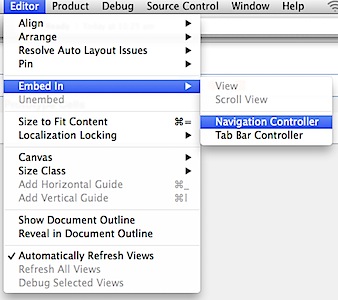
Now embed this TableViewController in a NavigationController, by clicking Editor menu and selecting Navigation Controller under Embed In menu option.

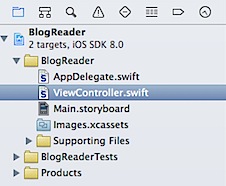
Select ViewController.swift file under Project Navigator and delete the file.

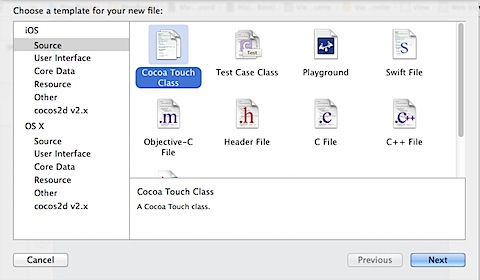
Right click on the Project folder and select New File option.

In the Choose a template screen, select Cocoa Touch under iOS and click Next button.


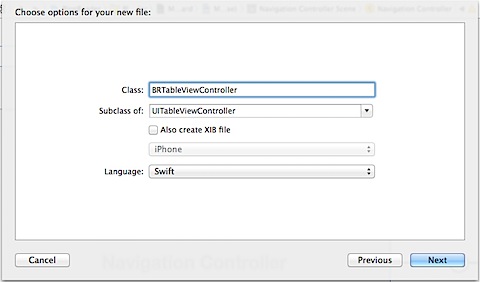
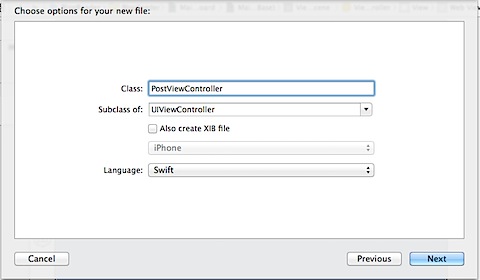
In the Choose options for new file screen, enter the class name as “BRTableViewController”, select Subclass of UITableViewController and Language as Swift.
Using NSXMLParser for parsing the blog feed
Navigate to BRTableViewController.swift class declaration, add NSXMLParserDelegate after UITableViewController.
class BRTableViewController: UITableViewController, NSXMLParserDelegate{
This is required as we need to use some of the functions defined in NSXMLParserDelegate for parsing the feed. Now declare a NSXMLParser variable called parser.
var parser: NSXMLParser = NSXMLParser()
Then update the viewDidLoad method with the following code.
override func viewDidLoad() {
super.viewDidLoad()
let url:NSURL = NSURL(string: “https://rshankar.com/feed”)
parser = NSXMLParser(contentsOfURL: url)
parser.delegate = self
parser.parse()
}
In the above lines of code, we are defining url for holding the feed. Then reinitialising the parser object with url and also setting the parser delegate to self. The parse( ) method would start parsing the feed. Before we write further code let us understand the structure of the blog feed. If you open the feed address (https://rshankar.com/feed) in your browser, you should notice the following XML structure.
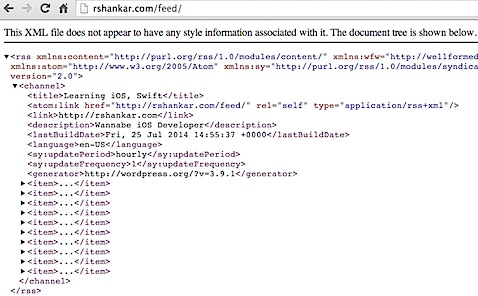
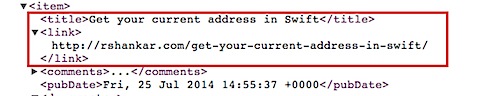
Each item element in the above screenshot provides details about the blog post. And on expanding item element, you should notice the following structure.
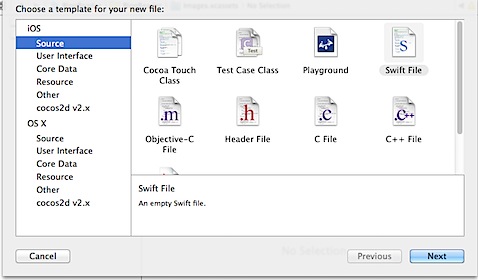
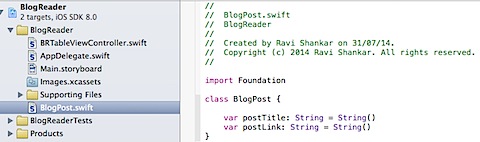
Right click on the Project folder, select New File and choose Swift File under iOS. Click Next and save the file as BlogPost.swift to the Project folder.
Navigate to BlogPost.swift, declare the class name as BlogPost and add two properties for holding title and link.


class BlogPost {
var postTitle: String = String()
var postLink: String = String()
}
And to hold all the blog posts let us define variable of type array. Navigate to BRTableViewController.swift and add the following code after the parser variable

var blogPosts: [BlogPost] = []
Implement the delegate method of NSXMLParser
Add the following three methods to BRTableViewController.swift. You can use Xcode autocomplete feature for adding these methods.
// MARK: – NSXMLParserDelegate methods
func parser(parser: NSXMLParser!, didStartElement elementName: String!, namespaceURI: String!, qualifiedName qName: String!, attributes attributeDict: [NSObject : AnyObject]!) {
}
func parser(parser: NSXMLParser!, foundCharacters string: String!) {
}
func parser(parser: NSXMLParser!, didEndElement elementName: String!, namespaceURI: String!, qualifiedName qName: String!) {
}
As already observed in structure of the blog feed, the blog post is specified under the element named item. So we need to do all initialisation of the variables when the parser starts with this element name. Let us add the following the variables to the class declaration.
var postTitle: String = String()
var postLink: String = String()
var eName: String = String()
Then initialise these variables didStartElement function when elementName is “item”
func parser(parser: NSXMLParser!, didStartElement elementName: String!, namespaceURI: String!, qualifiedName qName: String!, attributes attributeDict: [NSObject : AnyObject]!) {
eName = elementName
if elementName == “item” {
postTitle = String()
postLink = String()
}
}
Then update foundCharacters function with the following code.
func parser(parser: NSXMLParser!, foundCharacters string: String!) {
let data = string.stringByTrimmingCharactersInSet(NSCharacterSet.whitespaceAndNewlineCharacterSet())
if (!data.isEmpty) {
if eName == “title” {
postTitle += data
} else if eName == “link” {
postLink += data
}
}
}
In the above lines of code, we are removing the white space and newline character set. Then assign the values to corresponding variables if the content is not empty. Make sure to the append the values as the foundCharacters function will be called number of times for the same element name.
Then finally we add the following lines of code to didEndElement function. An instance of BlogPost is created and set with title and link values. Then this object is added to the blogPosts array.
func parser(parser: NSXMLParser!, didEndElement elementName: String!, namespaceURI: String!, qualifiedName qName: String!) {
if elementName == “item” {
let blogPost: BlogPost = BlogPost()
blogPost.postTitle = postTitle
blogPost.postLink = postLink
blogPosts.append(blogPost)
}
}
Displaying the content in TableViewController
Navigate to the Table View Data source section and remove the commented line in numberOfSectionsInTableView and set the return value as 1.
override func numberOfSectionsInTableView(tableView: UITableView!) -> Int {
return 1
}
The number of rows iN the table view will be equivalent to the total count of objects in blogPosts array. Update numberOfRowsInSection to reflect the array count.
override func tableView(tableView: UITableView!, numberOfRowsInSection section: Int) -> Int {
return blogPosts.count
}
Now uncomment cellForRowIndexPath function and update the function with the following lines of code.
override func tableView(tableView: UITableView!, cellForRowAtIndexPath indexPath: NSIndexPath!) -> UITableViewCell! {
let cell = tableView.dequeueReusableCellWithIdentifier(“Cell”, forIndexPath: indexPath) as UITableViewCell
let blogPost: BlogPost = blogPosts[indexPath.row]
cell.textLabel.text = blogPost.postTitle
return cell
}
In the above lines of code, we have changed the cell identifier to “cell”. Then retrieved the content for the cell using the row index path from the blogPosts array. Then assigned the value of post title to cell’s textLabel.
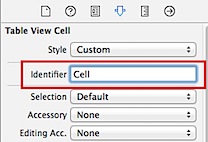
Now navigate to Main.storyboard, select tableview cell and set the Identifier to Cell using the Attributes inspector.

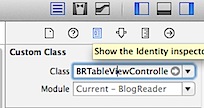
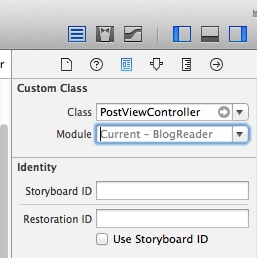
Then navigate to TableViewController and set the Class as BRTableViewController using the Identity inspector.

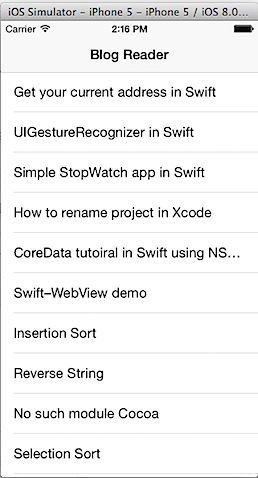
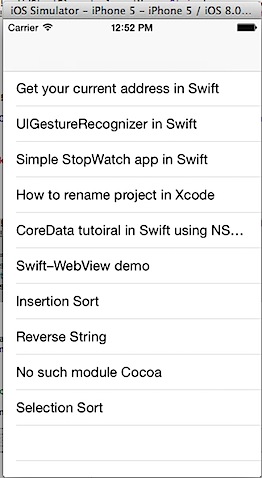
Now if you compile and run the project in iOS simulator, you should see the list of blog posts as shown in the below screenshot.

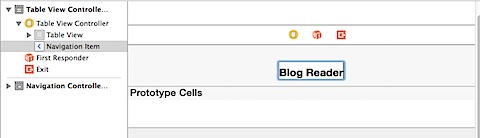
Let us make some cosmetic changes to the look of the table view. Navigate to Main.storyboard and add the title to navigation bar as Blog Reader.

Then add the following function to BRTableViewController.swift for adjusting the row height of the tableview cell.
override func tableView(tableView: UITableView!, heightForRowAtIndexPath indexPath: NSIndexPath!) -> CGFloat {
return 50.0
}
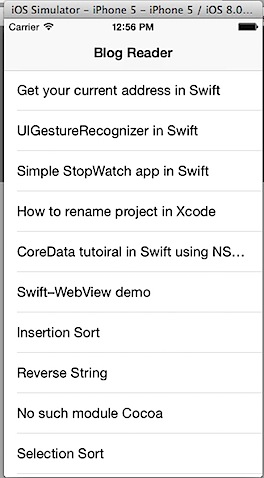
Now if you try to run the app on the simulator it should look as shown below.

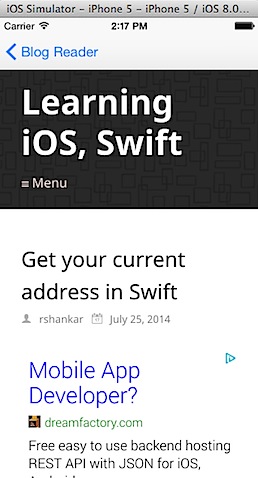
Displaying the post content in UIWebView
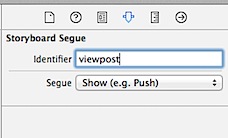
Now when users taps on post title, the user must be taken to another screen displaying the content of the post. For this purpose we to add another ViewController and use UIWebView for displaying the post content. Click Main.storyboard and add ViewController from object library to Storyboard. Now hold control and connect the UITableViewCell from BRTableViewController to the new ViewController, set the segue as “Show”. Then Provide the name of the Storyboard segue as viewpost.

Add a UIWebView control from object library to ViewController. Right click on the Project folder and select New File for adding ViewController class.
Select template as Cocoa Touch class and click Next button. Provide a name to the Class as PostViewController with Subclass of UIViewController. Then click Next and save the file to the Project folder.

Using the Identity inspector the set the class name for the ViewController in the storyboard as PostViewController.

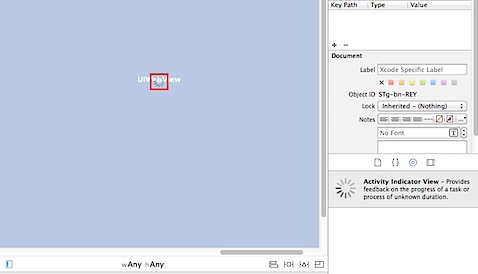
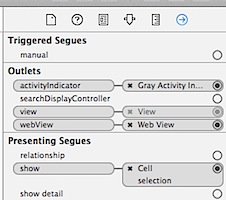
Let us also add a UIActivityIndicatorView that would be displayed till the blog post is getting loaded on the WebView.

Open PostViewController.swift file and add IBOutlets for UIWebView and UIActivityIndicatorView controls.
@IBOutlet var webView:UIWebView!
@IBOutlet var activityIndicator: UIActivityIndicatorView!
In the class declaration, next to UIViewController add UIWebViewDelegate. This is required as we will be implementing two of the UIWebViewDelegate functions.
class PostViewController: UIViewController, UIWebViewDelegate
Then add the following postLink property, the value for this property will be set when the user taps any post on table view.
var postLink: String = String()
Now update viewDidLoad function with following lines of code
override func viewDidLoad() {
super.viewDidLoad()
let url: NSURL = NSURL(string: postLink)
let request: NSURLRequest = NSURLRequest(URL: url)
webView.loadRequest(request)
webView.delegate = self
}
The above lines of code, calls loadRequest of UIWebView by passing a NSURLRequest object. Then sets the delegate for webView to self. Now implement the following UIWebView delegate functions for showing and hiding Activity Indicator View.
func webViewDidStartLoad(webView: UIWebView!) {
activityIndicator.hidden = false
activityIndicator.startAnimating()
}
func webViewDidFinishLoad(webView: UIWebView!) {
activityIndicator.hidden = true
activityIndicator.stopAnimating()
}
Finally use the connection inspector in the Interface builder to connect the IBOutlet variables (webView and activityIndicator) to the respective controls on the ViewController.

Navigate to BRTableViewController.swift and add the prepareForSegue function. Check if the identifier is “viewpost” and then retrieve the post details for the selected row using tableView.indexPathForSelectedRow(). Then assign the post web url to viewController’s postLink property.
override func prepareForSegue(segue: UIStoryboardSegue!, sender: AnyObject!) {
if segue.identifier == “viewpost” {
let blogPost: BlogPost = blogPosts[tableView.indexPathForSelectedRow().row]
let viewController = segue.destinationViewController as PostViewController
viewController.postLink = blogPost.postLink
}
}
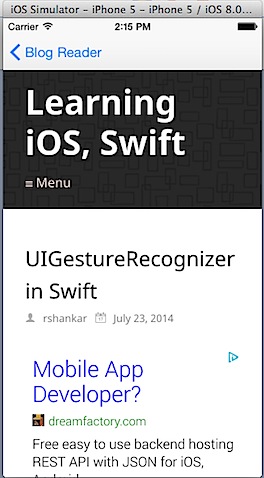
Now if you compile and run the project, you should be able to view the post details on tapping any of the post in the table view.

Download source code from GitHub