Create an example iOS Project using Xcode
We had already covered the basic overview of Xcode and now we are going see the steps required for creating an sample iOS Project that displays Welcome message on Xcode simulator.
Topics Covered
-
Create New Project using Xcode.
-
Add label control to Interface Builder.
-
Edit label to add Welcome message
-
Choose simulator in Xcode.
-
Compile, Build and Run the project in Xcode.
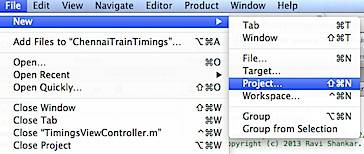
Step 1: Launch Xcode then click FIle -> New -> Project.
Step 2: In the Choose a template for your new project, pick Single View Application under the IOS section and click the Next button.
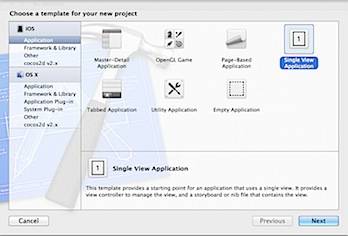
Note :- We will cover the different templates in detail in future tutorials.
Step 3: Now in Choose options for your new project, enter the name for your project, organisation name and company identifier. In the Devices drop down select iPhone and mark the check box with caption as “Use Storyboards” and “Use Automatic Reference Counting” and click Next button.
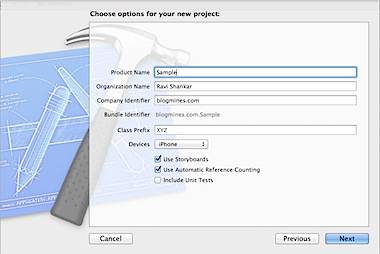
Some of the above terms like Storyboards, Automatic Reference Counting will be covered in future tutorials.
Step 4: Specify the location for creating this project and click the Create button.
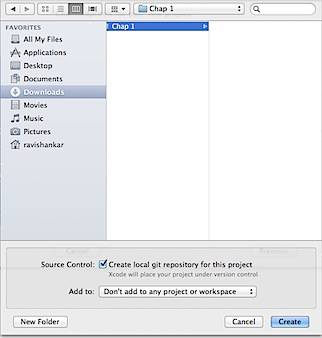
Now a new project should be created and you should see a screen as shown below.
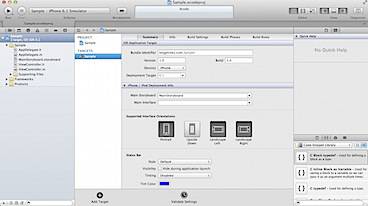
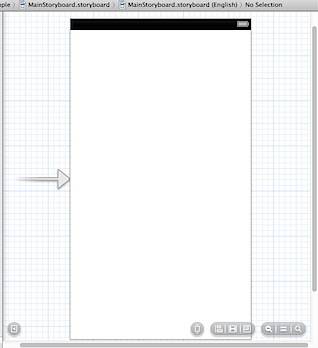
Step 5: Select the MainStoryboard.storyboard in the Navigator Pane to access the Interface Builder.
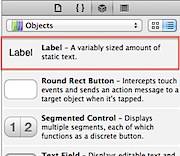
Step 6: Navigate to Utilities section and click Object tab. Scroll down and pick label control from the list then drag and drop the label on to Interface Builder.
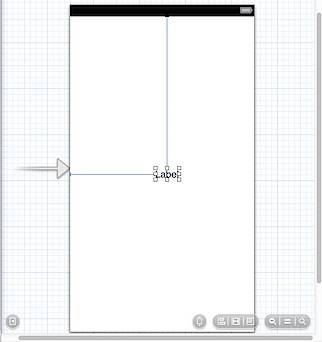
Step 7: Edit the label and enter Welcome text.

Step 8: Now select the iPhone simulator under Scheme section in Xcode toolbar.

Step 8: Select Run option on Xcode toolbar or use the keyboard combination of command + R to run the sample project on Xcode simulator for iPhone. command + R will first compile and build the project before launching it on the simulator.
