• Skip to main content
  • Skip to primary sidebar

Ravi Shankar

Tweaking Apps

  • Swift
  • Tech Tips
You are here: Home / Office 2010 / How to create timeline using Word

How to create timeline using Word

October 6, 2015 By Ravi Shankar Leave a Comment

Word 2016, 2013 & 2010 have a feature that helps users to create timeline in a Word document. Listed below the steps that can be followed for creating a timeline.

Step 1: Navigate to Insert menu, click the SmartArt option under Illustrations section

image

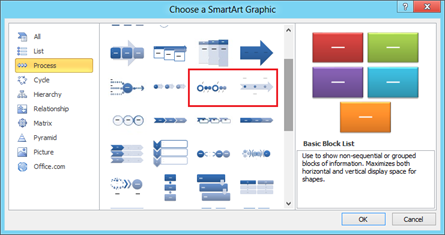
Step 2: This would display the following Choose a SmartArt Graphic window as shown below.

image

Step 3: Click the Process section then scroll down and select a timeline option.

image

You can either select Circle Accent Timeline or Basic Timeline.

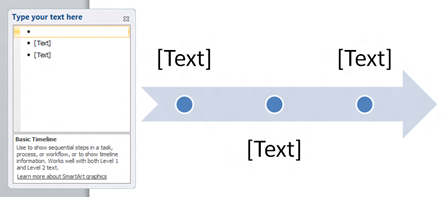
Step 4: A window for typing the timeline text will be displayed along with the Timeline as shown below. This window allows you to type the text for the timeline.

image

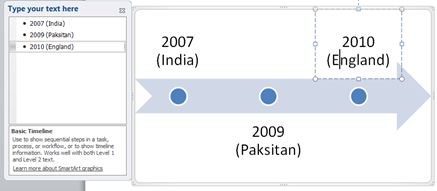
For example if you wanted to make a timeline for Word Cup T20 Cricket Winners.

image

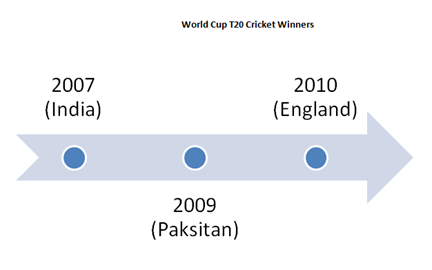
A finished timeline will look as shown below.

image

Filed Under: Office 2010, Word 2010 Tagged With: basic timeline, circle timeline, Create, Document, timeline, Word 2010

Reader Interactions

Leave a Reply Cancel reply

Your email address will not be published. Required fields are marked *

This site uses Akismet to reduce spam. Learn how your comment data is processed.

Primary Sidebar

TwitterLinkedin

Recent Posts

  • How to block keywords in Jio broadband
  • How to disable opening an app automatically at login in Mac
  • How to set preferred Wifi network on Mac
  • Attribute Unavailable: Estimated section warning before iOS 11.0
  • How to recover Firefox password from Time Machine backup

Pages

  • About
  • Privacy Policy
  • Terms and Conditions

Copyright 2022 © rshankar.com

Terms and Conditions - Privacy Policy