
iOS Swift - Firebase Demo
Firebase is a platform that allows web and mobile application to store data in cloud. In this article, we will see an example app written in Swift that uses Firebase for storing and retrieving data in real time. The source code for this demo is available under GitHub.

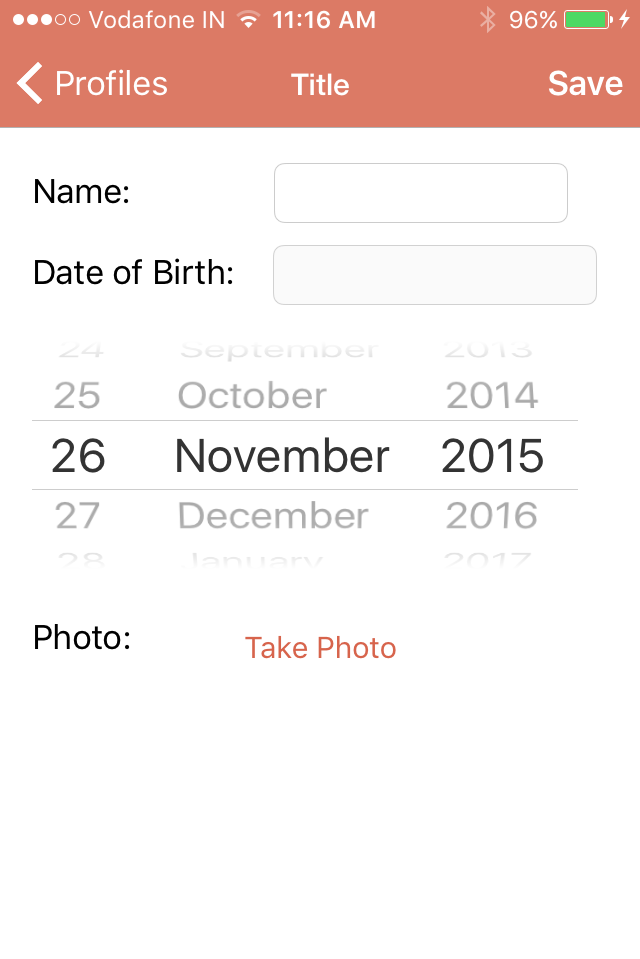
This demo app consists of three fields for capturing name, date and image. These data are then converted in to required data type for storing purpose.
Installing Firebase in iOS SDK Project
The easiest way to include Firebase SDK to your iOS project is by using Cocoapods and the instruction are clearly given in Firebase documentation section. After installing the Firebase iOS sdk make sure to create a bridge file by adding the following import statement.
#import Firebase/Firebase.h
Firebase DataStore
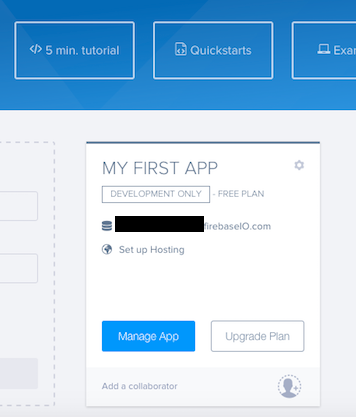
User with Google or GitHub account can directly login to Firebase. The data stored in Firebase in JSON format. Find below a screenshot of the data stored by this demo app.

Profiles is top node and under which each row is stored as key/value pairs with name as the identifier for each row. Firebase provides a path (URL ) for storing the data which ends with firebaseio.com. You should be able find this URL in Firebase main screen.
Example :- _unique_identifier_.firebaseio.com
Saving data to Firebase
You need to create a reference to Firebase class as shown below
let firebase = Firebase(url:"https://_unique_identifer.firebaseio.com/profiles")
replace _unique_identifer with the identifier provided for your Firebase account.
The following piece of code is used for saving the information to Firebase.
@IBAction func save(sender: AnyObject) {

let name = nameTextField.text
var data: NSData = NSData()

if let image = photoImageView.image {
    data = UIImageJPEGRepresentation(image,0.1)!
}

let base64String = data.base64EncodedStringWithOptions(NSDataBase64EncodingOptions.Encoding64CharacterLineLength)

let user: NSDictionary = ["name":name!,"dob":dateOfBirthTimeInterval, "photoBase64":base64String]

//add firebase child node
let profile = firebase.ref.childByAppendingPath(name!)

// Write data to Firebase
profile.setValue(user)
}
The above code does the following
- Converts image to to JPEG also compresses the size as we will be storing the image as base64EncodedString.
- Creates a dictionary with name, image (String data) and date (as timeinterval).
- This dictionary is then added to the FIrebase Datastore by appending the name as the identifier for each row.
- And to save the data to Firebase, you need to call
profile.setValueby passing the dictionary object.
Retrieving data from Firebase
Here again you need to create a reference to Firebase class by passing the required path as shown below
let firebase = Firebase(url:"https://_unique_identifer.firebaseio.com/profiles"
In the following price of code, firebase.observerEventType is used for retrieving the data from Firebase account. The data gets refreshed in real time when ever any updates happen in the data store. This is really cool!!!
func loadDataFromFirebase() {

UIApplication.sharedApplication().networkActivityIndicatorVisible = true

firebase.observeEventType(.Value, withBlock: { snapshot in
    var tempItems = [NSDictionary]()

    for item in snapshot.children {
        let child = item as! FDataSnapshot
        let dict = child.value as! NSDictionary
        tempItems.append(dict)
    }

    self.items = tempItems
    self.tableView.reloadData()
    UIApplication.sharedApplication().networkActivityIndicatorVisible = false
})
}
snapshot referes to the collection of records store under a path. You can iterate through the collection to reteive each data item.
Delete a row from Firebase
override func tableView(tableView: UITableView, commitEditingStyle editingStyle: UITableViewCellEditingStyle, forRowAtIndexPath indexPath: NSIndexPath) {
    if editingStyle == .Delete {
        let dict = items[indexPath.row]
        let name = dict["name"] as! String

        // delete data from firebase
        let profile = firebase.ref.childByAppendingPath(name)
        profile.removeValue()
    }
}
Removing a row from Firebase can be done by calling removeValue method on the Firebase object reference as shown in the above code snippet.
In this tutorial, we have seen only the code related with Firebase. You can download the full source from here
import UIKit
import Firebase

class ViewController: UIViewController {

    @IBOutlet weak var textField: UITextField!
    var myRootRef = Firebase(url:"https://your-firebase-root-url.firebaseio.com")

    override func viewDidLoad() {
        super.viewDidLoad()
    }

    @IBAction func sendData(sender: AnyObject) {
        myRootRef.setValue(textField.text)
    }
}
// AppDelegate.swift
import UIKit
import Firebase

@UIApplicationMain
class AppDelegate: UIResponder, UIApplicationDelegate {

    var window: UIWindow?

    func application(application: UIApplication, didFinishLaunchingWithOptions launchOptions: [NSObject: AnyObject]?) -> Bool {
        // Override point for customization after application launch.
        Firebase.defaultConfig()
        return true
    }
}
```swift pod ‘Firebase’, ‘>= 2.3.3’