Simple UITableView and UIAlertView example
In this article, we are going to see how to create a simple UITableView for displaying data. And display an alert on selection of any row using UIAlertView.
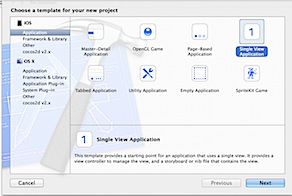
Launch Xcode, Click File > New Project and select Single View Application as the project template.
Enter the project details for Product Name, Organization Name, Company Identifier and Target device as iPhone.
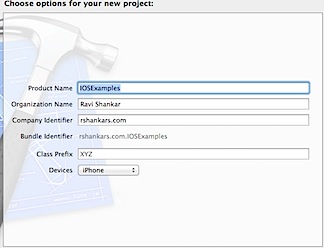
Then choose a location on your Mac to save the project.
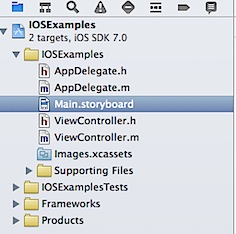
Navigate to Main.Storyboard and and delete the ViewController under View Controller Scene. Since we want a TableView, we are going to replace this View Controller with UITableViewController.
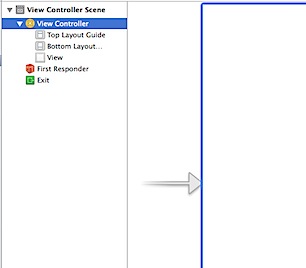
Note :- We could have also used UITableView on top of View Controller but we will keep that for another session.
Now select UITableViewController from the Object library, drag and drop it on to the User Interface.
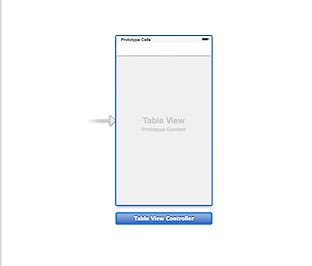
Let us see the how to display list of values in the above table.
Navigate to ViewController.h in the Project Navigator and replace the following line
@interface ViewController : UIViewController
with
@interface ViewController : UITableViewController
Then use the Identity Inspector and specify the class for TableViewController as ViewController.

Edit ViewController.m file and add a new instance variable and populate the cities in ViewDidLoad method.
@implementation ViewController
{
NSArray *cities;
}
- (void)viewDidLoad
{
[super viewDidLoad];
//Create the list of cities that will be displayed in the tableview
cities = [[NSArray alloc] initWithObjects:@”Chennai”,@”Mumbai”,@”New Delhi”, @”New York”, @”London”,@”Tokyo”,@”Stockholm”,@”Copenhagen”,@”Manchester”,@”Paris”,nil];
}
In the above code, cities is of type NSArray and it is initialised with set of values in the ViewDIdLoad method. These values will be displayed in the UITableView.
The ViewController will act as a delegate and datasource for the UITableViewController. These connections are automatically created and you can verify them by right clicking on the ViewController. If we had used UITableView instead of UITableViewController then these connections have to be made manually.
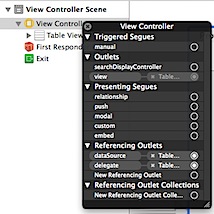
The data for the tableview is provided by the following methods and these methods needs to be implemented in ViewController.m.
-(NSInteger)tableView:(UITableView *)tableView numberOfRowsInSection:(NSInteger)section
-(UITableViewCell *)tableView:(UITableView *)tableView cellForRowAtIndexPath:(NSIndexPath *)indexPath
numberOfRowsInSection method is used for specifying the total rows in each section for the tableview. In this example, the UITableView has only one section for displaying the cities.
cellForRowAtIndexPath method is used for providing the data to each row in the TableView. The data is populated using the indexPath for each row.
Copy the method implementation to ViewController.m file
-(NSInteger)tableView:(UITableView *)tableView numberOfRowsInSection:(NSInteger)section
{
return [cities count];
}
-(UITableViewCell *)tableView:(UITableView *)tableView cellForRowAtIndexPath:(NSIndexPath *)indexPath
{
UITableViewCell *cell = [tableView dequeueReusableCellWithIdentifier:@”Cities”];
cell.textLabel.text = [cities objectAtIndex:indexPath.row];
return cell;
}
The numberOfRowsInSection provides the tableview with the total count of rows i.e number of items in the cities array object. In the cellForRowAtIndexPath, we create a reusable UITableViewCell and assign the cities as per the row indexPath. Also make sure to specify the Identifier for prototype cell (User Interface) as Cities using the Attributes Inspector.
Now if you build and run the project, you should see a table with list of cities as shown below.
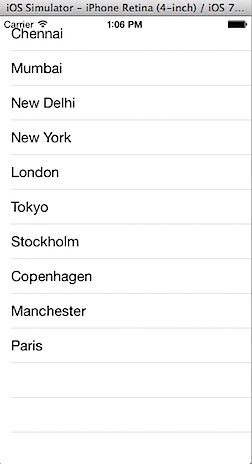
Display the row selection using UIAlertView
Nothing will happen when you select any of the rows in the above table. Let us use the UIAlertView to display the row selection and for this we need to implement didSelectRowAtIndexPath in ViewController.m. Add the following didSelectRowAtIndexPath method implementation to the file.
-(void)tableView:(UITableView *)tableView didSelectRowAtIndexPath:(NSIndexPath *)indexPath
{
NSString *cityName = [cities objectAtIndex:indexPath.row];
UIAlertView *alertView = [[UIAlertView alloc] initWithTitle:@”City” message:cityName delegate:self cancelButtonTitle:@”Cancel” otherButtonTitles:nil, nil];
[alertView show];
}
The above code first retrieves the city name from cities array object using the row’s indexPath. In the second line, we create a instance of UIAlertView with title as “City”, selected city for the message attribute and provide the title for the cancel button. The delegate for UIAlertView will be ViewController and this specified by the delegate attribute. In the last line we use the show method to display the alert.
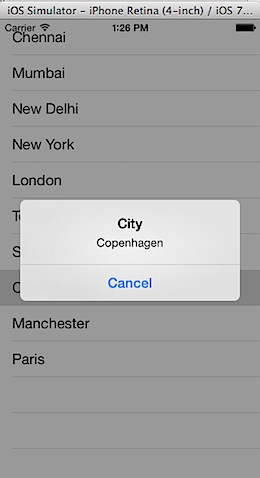
Download the source code from here.
