
Test Driven Development in iOS - Beginners tutorial - Part 1
This is a beginner tutorial on TDD in iOS, explained with an example app that adds two numbers. Let us see try to use some XCTest assertions supported in iOS in this project.
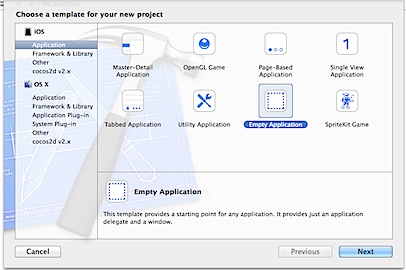
Create a New iOS project select the template as Empty Application
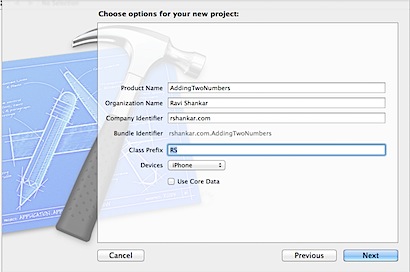
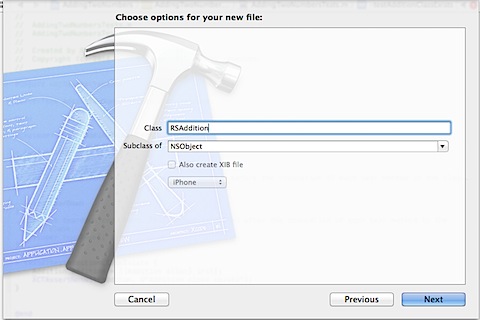
Enter the required details in Choose options for your new project screen.
Step 3: Then specify the folder to save this project.
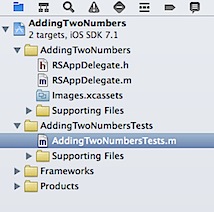
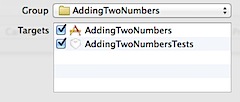
The project navigator screen will have two targets, one for app and add another for XCTest framework. The folder that ends with “Tests” will contain the default XCTest file .
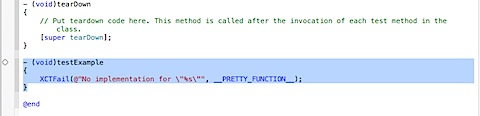
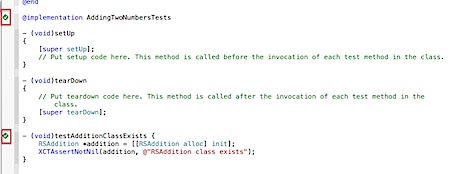
Lets use the class AddingTwoNumbersTests.m for testing the application logic. Open AddingTwoNumbersTests.m and delete default testExample method.
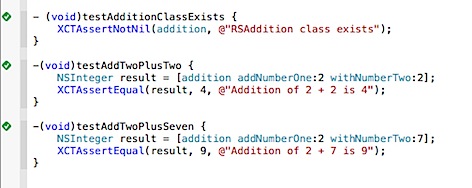
Create a failing method that tests for existence of new “RSAddition” class that is going to have method for adding two numbers.

You should notice the errors displayed in the above screenshot after adding testAdditionClassExists. To fix these error, create a new class named RSAddition subclass of NSObject and add the class to both the targets. Then import the Addition.h in “AddingTwoNumbersTests.m”.
Now the tests should pass when it gets executed. You should notice the green tick mark before the class and method and shown in the below screenshot.
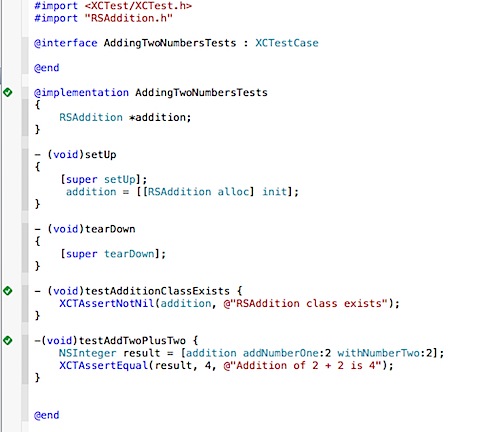
Now add the following method to do a simple addition of 2+2.
-(void)testAddTwoPlusTwo {
RSAddition *addition = [[RSAddition alloc] init];
NSInteger result = [addition addNumberOne:2 withNumberTwo:2];
XCTAssertEqual(result, 4, @”Addition of 2 + 2 is 4”);
}
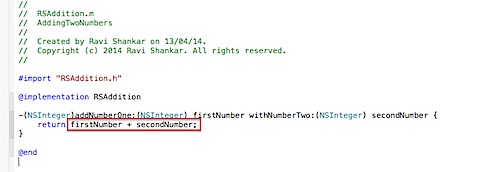
RSAddition class needs to have a new method addNumberOne: withNumberTwo: Add the method definition in RSAddition.h interface file.
-(NSInteger)addNumberOne:(NSInteger) firstNumber withNumberTwo:(NSInteger) secondNumber;
Then add the following method to RSAddition.m implementation file. Let us hardcode the result “4” for time being to pass this test.
-(NSInteger)addNumberOne:(NSInteger) firstNumber withNumberTwo:(NSInteger) secondNumber {
return 4;
}
Now the test should get executed successfully.

Let us add another test to fix the hardcoding problem. This time we will add two different numbers 2 and 7. But before adding the test method, we need to refactor the existing code in the test file. The below code is used by both the test methods and this is the best candidate to be placed under setup method.
RSAddition *addition = [[RSAddition alloc] init];
The changed code should look as shown in the below screenshot.
Adding the below method should fail as the addition method is hardcoded to return value as 4.
-(void)testAddTwoPlusSeven {
NSInteger result = [addition addNumberOne:2 withNumberTwo:7];
XCTAssertEqual(result, 9, @”Addition of 2 + 7 is 9”);
}

Now edit the addition method to fix this problem. It requires just a one line change and now the test should pass.
The next tutorial will cover the steps for adding the view controller and required fields for adding two numbers using the above added application logic class.
Download source code from here.
Need iOS Help?
I help developers and founders with:
- New apps — idea to App Store
- Bug fixes, debugging & rescue
- App Store rejections
- Code review & mentoring
10+ years iOS • 10+ published apps • 11,000+ students trained