Get your current address in Swift (Swift 5)

In this Swift tutorial, we will see the steps required for using CoreLocation framework and retrieve the latitude and longitude of the location. Then use the CLGeocoder to reverse geocode the latitude and longitude details. This is a very basic tutorial that retrieves the location details on tap of a button and displays the information on the screen.

Updated :- The source has now been to updated to show the address details in TextFields.

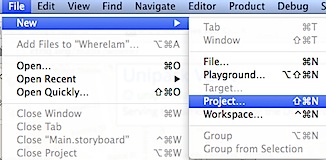
Click File -> New and select Project sub menu list.

201407251656.jpg

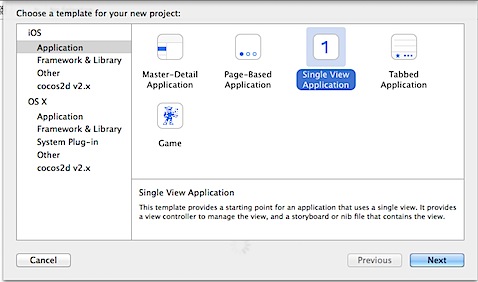
In the Choose a template screen, select Single View Application and click Next button.

201407251657.jpg

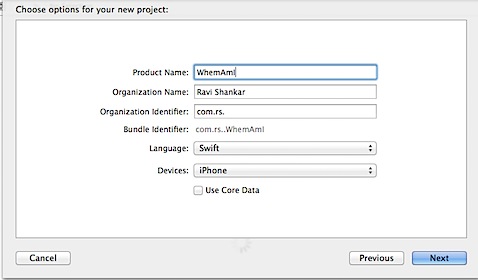
Enter the product name as WhereAmI and select the language as Swift then click Next. Select a folder and create the new project and that folder.

201407251658.jpg

Navigate to ViewController.swift file and add a new function with name as findMyLocation after viewDidLoad function.

@IBAction func findMyLocation(sender: AnyObject) {

}

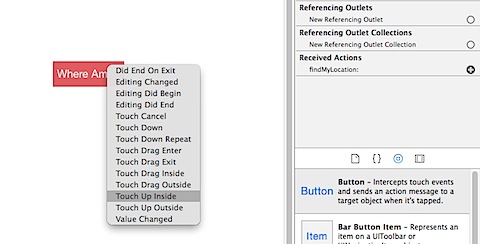
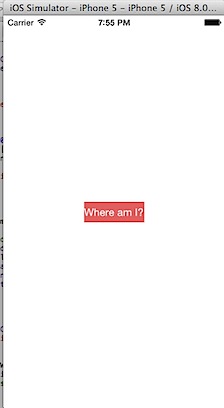
Navigate to Main.storyboard file, drag and drop Button from the Object Library on to the View Controller. Using the attributes inspector, change the name of the button to “Where Am I?”. If you need then change the background and text colour for the button. Then centre align the button both vertically and horizontally. Use the Resolve Auto Layout Option and pick Reset to Suggested Constraints.

201407251707.jpg

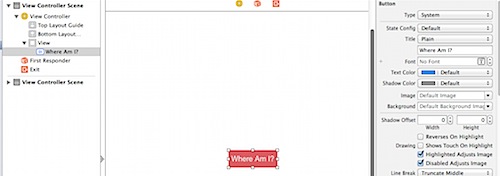
Navigate to Connections Inspector and connect the button to the findMyLocation action under Received Actions (Touch Up Inside event).

201407251711.jpg

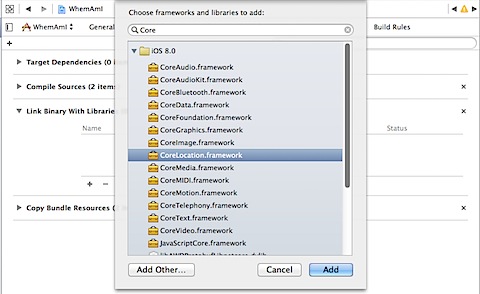
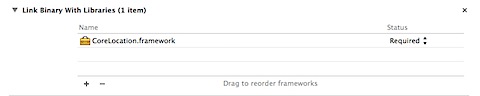
Click the Project under Project Navigator and navigate to Build Phases. Click the + sign under Link Binary With Libraries and pick CoreLocation.framework from the list.

Add CoreLocation framework to Swift project201407251718.jpg

CoreLocation in Swift

Now navigate back to ViewController.swift file, add import CoreLocation after UIKit. Then we need to assign the current class as the delegate for CLLocationManagerDelegate. This is required because we will be using couple of delegate methods from CLLocationManager.

class ViewController: UIViewController, CLLocationManagerDelegate {

Define a constant for CLLocationManager after the class declaration.

let locationManager = CLLocationManager()

Navigate to IBAction function findMyLocation and add the following code

locationManager.delegate = self
locationManager.desiredAccuracy = kCLLocationAccuracyBest
locationManager.requestWhenInUseAuthorization()
locationManager.startUpdatingLocation()

The above lines sets the class as delegate for locationManager, specifies the location accuracy and starts receiving location updates from CoreLocation. In order to get the location updates we need to implement the delegate functions of CLLocationManager, didUpdateLocations and didFailWithError

func locationManager(manager: CLLocationManager!, didUpdateLocations locations: [AnyObject]!) {
}

func locationManager(manager: CLLocationManager!, didFailWithError error: NSError!) {
}

didUpdateLocations function is triggered when new location updates are available. Similarly didFailWithError is called when there is a problem receiving the location updates. Let us first start implementing the simpler one i.e didFailWithError function. When there is an error, we are going to log the message to the console.

func locationManager(manager: CLLocationManager!, didFailWithError error: NSError!) {
	println("Error while updating location " + error.localizedDescription)
}

Then update didUpdateLocations function with the following code, also add a new function for printing the location details.

func locationManager(manager: CLLocationManager!, didUpdateLocations locations: [AnyObject]!) {
CLGeocoder().reverseGeocodeLocation(manager.location, completionHandler: {(placemarks, error)->Void in
		if error {
			println("Reverse geocoder failed with error" + error.localizedDescription)
			return
		}

		if placemarks.count > 0 {
			let pm = placemarks[0] as CLPlacemark
			self.displayLocationInfo(pm)
		} else {
			println("Problem with the data received from geocoder")
		}
	})
}

func displayLocationInfo(placemark: CLPlacemark) {
	if placemark != nil {
		//stop updating location to save battery life
		locationManager.stopUpdatingLocation()
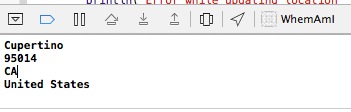
		println(placemark.locality ? placemark.locality : "")
		println(placemark.postalCode ? placemark.postalCode : "")
		println(placemark.administrativeArea ? placemark.administrativeArea : "")
		println(placemark.country ? placemark.country : "")
	}
}

in the didUpdateLocations function, we pass the location co-ordinates to

 CLGeocoder().reverseGeocodeLocation

. Then check for error and process the location array (placemarks). Then for displaying the location details, we pass the placemark detail to displayLocationInfo function.

Add key to Info.plist for request permission to User’s location

In order to use the user’s location you need to request permission from the user by adding the keys “NSLocationWhenInUseUsageDescription” or “NSLocationAlwaysUsageDescription” to your Info.plist file, with the value blank or optionally a message included in the prompt to the user. One of those two key is required in iOS 8 to ask for your location.

Testing Location in Simulator

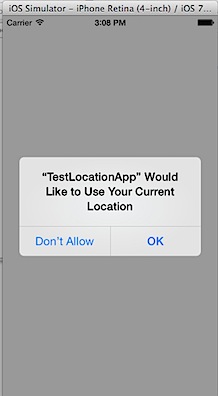
It is not possible to test current location with simulator. So we need to define a custom location or use the location already defined for debug purpose. When an app tries to access the location services on a simulator it displays the following popup.

Current Location Simulator Xcode 6

Here is a workaround to test the app using Xcode 11. Run the app on the a Simulator and tap “Find My Location” button. Nothing will happen as the app has not been given permission to use Location Services on Simulator.

201407251956.jpg

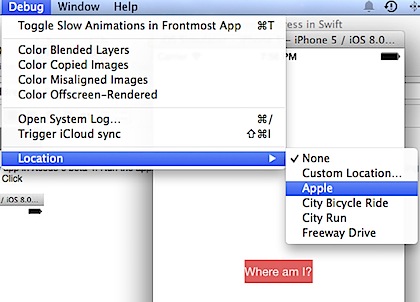
Click Debug menu then Location and select Apple from the sub menu list. Still nothing happens with the app and no messages are written to the console.

201407251957.jpg

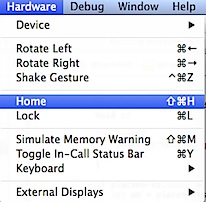
Now click Hardware menu and select Home from menu list.

201407251959.jpg

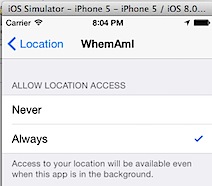
Tap the Settings icon on Simulator -> Privacy -> Location -> Tap , select Always to allow the app to access the location.

201407252003.jpg201407252005.jpg

Now you should see Apple address details in the Console Output.

201407252008.jpg

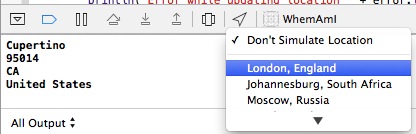
You can also try out other location using the Simulate Location option.

Simulate location in Xcode 6 simulator

Hopefully the testing should be lot easier after issue with “Allow to use Current Location” is fixed.

Source from GitHub


Comments

22 responses to “Get your current address in Swift (Swift 5)”

  1. SwiftLearner Avatar
    SwiftLearner

    Thank you for sharing! I discovered why the simulator isn’t prompting for location. It’s because you must add “NSLocationWhenInUseUsageDescription” or “NSLocationAlwaysUsageDescription” to your Info.plist file, with the value blank or optionally a message included in the prompt to the user. One of those two is required for iOS 8 to ask for your location.

    Also, to initiate the prompt:
    “locationManager.requestWhenInUseAuthorization()”

    https://developer.apple.com/library/prerelease/ios/documentation/CoreLocation/Reference/CLLocationManager_Class/index.html#//apple_ref/occ/instm/CLLocationManager/requestWhenInUseAuthorization

    https://developer.apple.com/library/prerelease/ios/documentation/General/Reference/InfoPlistKeyReference/Articles/CocoaKeys.html#//apple_ref/doc/uid/TP40009251-SW26

    1. Thanks for solving and sharing the details.

    2. Do you know how to specifically get the location? Like “1 Infinite Loop” in “1 Infinite Loop, Cupertino, CA 95014”.

      1. Do you mean get the location, show the location on map. If that is the case then get lat/long of that location and add that as map point.

  2. I cannot get this app working, I get an error “Type ‘ViewController’ does not conform to protocol ‘CLLocationManagerDelegate’” at the line “locationManager.delegate = self”

    I cannot figure out what is going wrong, please help I am trying to learn swift 😀

    //
    // ViewController.swift
    // WhereIsThomas
    //
    // Created by Archimedes on 9/15/14.
    // Copyright (c) 2014 FreeZone. All rights reserved.
    //

    import UIKit

    import CoreLocation

    class ViewController: UIViewController {
    let locationManager = CLLocationManager()

    func locationManager(manager: CLLocationManager!, didUpdateLocations locations:
    [AnyObject]!) {
    CLGeocoder().reverseGeocodeLocation(manager.location, completionHandler: {(placemarks, error)->Void in

    if error {
    println(“Reverse geocoder failed with error ” + error.localizedDescription)
    return
    }

    if placemarks.count > 0 {
    let pm = placemarks[0] as CLPlacemark
    self.displayLocationInfo(pm)
    } else {
    println(“Problem with the data received from geocoder”)
    }
    })
    }

    func displayLocationInfo(placemark: CLPlacemark) {
    if placemark != nil {
    //stop updating location to save battery life
    locationManager.stopUpdatingLocation()
    println(placemark.locality ? placemark.locality : “”)
    println(placemark.postalCode ? placemark.postalCode : “”)
    println(placemark.administrativeArea ? placemark.administrativeArea : “”)
    println(placemark.country ? placemark.country : “”)
    }
    }

    override func viewDidLoad() {
    super.viewDidLoad()
    // Do any additional setup after loading the view, typically from a nib.
    }

    @IBAction func findMyLocation(sender: AnyObject) {
    locationManager.delegate =
    locationManager.desiredAccuracy = kCLLocationAccuracyBest
    locationManager.startUpdatingLocation()

    }
    override func didReceiveMemoryWarning() {
    super.didReceiveMemoryWarning()
    // Dispose of any resources that can be recreated.
    }

    }

    1. your class needs to implement CLLocationManagerDelegate. Check out the below line.

      class ViewController: UIViewController, CLLocationManagerDelegate {

      1. Hey! I have implemented the CLLocationManagerDelegate, but I have the “Does not conform to protocol ‘NSObjectProtocol’” why is it asking for a NSOBjectProtocol?

  3. hi,

    I am getting an error at the following line:

    if placemark != nil {

    it is saying “cannot invoke != with an argument list of type (CLPlacemark, NiLiteralConvertible)

    Any idea?

    1. I have updated the code for the latest iOS 8 release. Can you please download the code again (I am yet to update my blog content).

      1. im new to swift programming, ios programming at all!

        followed your tutorial but got the same error at the end (cannot invoke !=…).

        after downloading your updated code the app buils ans starts.
        but a click on the button just shows the geo-icon for a second and nothing else.

        is there anything i forgot? (debug-location set to apple)

      2. I wrote it that line like this at first
        if (placemark != nil) {

        but after I finished writing my code, I removed the () and it marked it as correct. Somewhere in your code is missing something.

        I can’t use
        if error {
        but it does accept the line
        if error != nil

        this baffles me.

    2. Wait, I just figure out why, it must’ve been a change in Xcode 6.1

      you have to add ! in front of CLPlacemark. basically like this

      func displayLocationInfo(placemark: CLPlacemark!) {
      if placemark != nil {

      1. Thanks for sharing the info.

  4. Thank you very much !

  5. Oh my… My fault. i saw the output now… i expected it to appear in the simulator itself.

    are you going to update the tutorial with steps to show the location inside of the app?

  6. Paul Wochnick Avatar
    Paul Wochnick

    Can you describe how you would get the latitude and longitude from the current location in swift?

  7. add these lines at the end of displayLocationInfo

    println(containsPlacemark.location.coordinate.latitude)
    println(containsPlacemark.location.coordinate.longitude)

    this print latitude and longitude

    1. Thanks for sharing the info.

  8. I’m getting some errors with this on Swift 2. Will you be updating it to the newest version? Just a few errors, but as a beginner its a little hard to debug! Awesome tutorial regardless.

  9. Osama Ibrahim Avatar
    Osama Ibrahim

    Thank you
    thats helpfull 🙂 🙂

  10. Hi rshankar and tanks for tutorial, a little question for help me please… How can I share the location with a mail??? Thanks in advance and continue your great tutorial

  11. subashini Avatar
    subashini

    Very nice . Easy to understand.Thankyou so much

Leave a Reply to Dani M Cancel reply

Your email address will not be published. Required fields are marked *

This site uses Akismet to reduce spam. Learn how your comment data is processed.