Storyboard, Scene and Segue
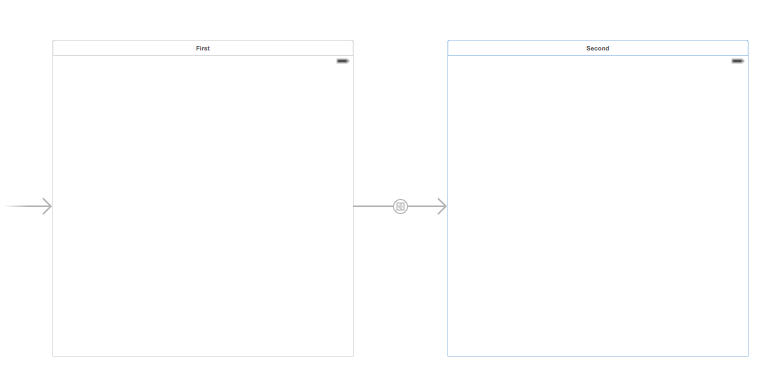
Storyboard in iOS is helps you to design the user interface of your App. A storyboard can contain one or more Scenes (View Controllers) and the connection or relationship between two scenes are known as Segue. This is how a typical storyboard with Scenes and Segue look.
The above example storyboard contains two scenes, first and second. These scenes are connected to each other by a Show Segue. Now let us see more about the Storyboard and Segues
Initial ViewController
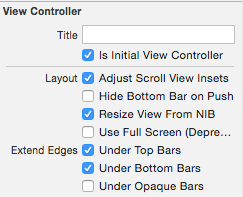
App needs to know the ViewControler that will be displayed as the initial screen. You can set any controller as the initial scene using the option available as part of the Attributes Inspector
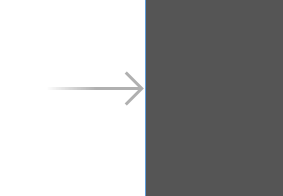
The storyboard will display an arrow in front of the Initial View Controller as shown in below screenshot. You can also drag and drop this arrow to the change the Initial View Controller.
Types of Segues
A segue is a relationship set between two view controllers. This can be done by pressing Control then drag and drop from one View Controller to anlther. Listed below are the different types of segues
-
Show
-
Show Detail
-
Present Modally
-
PopOver Presentation
-
Custom
Check out this excellent Stackoverflow answer on types of Segues
Unwind Segues
Only the Show segue has a back button in the navigation bar of the child controller which takes you back to the Parent controller. For rest of the segues, we can use unwind segues to dismiss the child controller. Unwind segue can be created by first adding a IBAction with parameter type as UIStoryboardSegue to the parent Vuew Controller.
//MARK:- Unwind Segue
@IBAction func cancel(segue:UIStoryboardSegue
{ // do nothing }
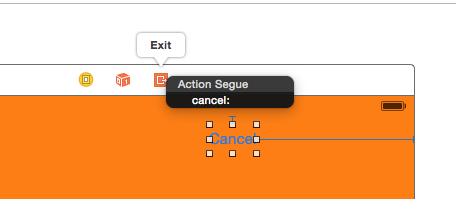
Add a button to the child view controller press Control then drag and drop the button to the Exit button available at the top of the ViewController. Now select the Action Segue which was added to the parent view controller.
Transfering data between ViewControllers
One of the common question that gets asked is “how to transfer data between two view controllers”. Create a property in the child view controller and set the value for this property in the prepareForSegue function of the parent view controller.
//MARK:- ViewController Transition

     override func prepare(for segue: UIStoryboardSegue, sender: Any?) {
        if  segue.identifier  ==   "detail"   {
            let  childViewController  =  segue.destination  as! SecondViewController
            childViewController.studentName  =  nameTextField.text
        }
    }
In the above prepareForSegue function, we check whether segue identifier is equal to detail. The identifier name can be provided under the Storyboard Segue in Attributes Inspector. Then we set the value for studentName property of the SecondViewController. By this way, you can transfer data between the View Controllers,
In the SecondViewController, you should be able access this property value and perform the required action. The below viewDidLoad code snippet access the property value and displays it in a label.
class SecondViewController: UIViewController {

    var studentName:String?
    @IBOutlet var displayName:UILabel!

    override func viewDidLoad() {
        super.viewDidLoad()

        // Do any additional setup after loading the view.
        if let name = studentName {
            displayName.text = name
        }
    }
}
Non Segue Transition
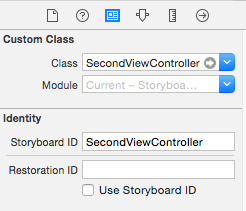
Another alternate way to transition between the View Controllers is to use instantiateViewController withIdentifier function of storyboard
//MARK:- Non Segue
  @IBAction func nonSegueCall(sender: AnyObject) {
        let childViewContoller  =
            storyboard?.instantiateViewController(withIdentifier: "SecondViewController") as! SecondViewController
        childViewContoller . studentName  =  nameTextField.text
        present( childViewContoller ,  animated: true ,  completion: nil)
    }
The above code snippet provides the same behaviour as prepareForSegue function. This function can be called on tap of a button and this requires an identifier to specified for the View Controller.
Download sample code from here.

