Navigation Controller in iOS
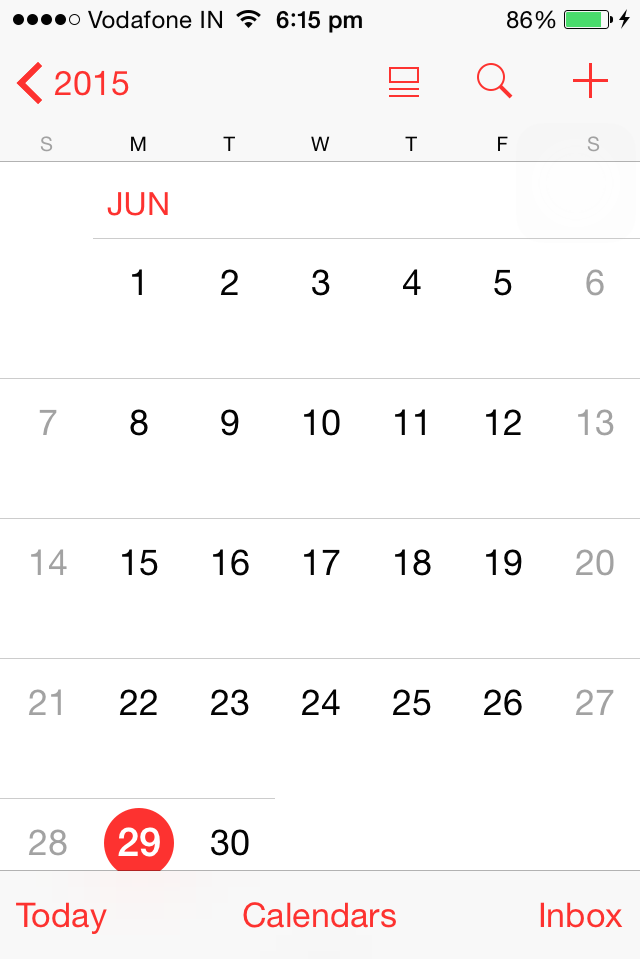
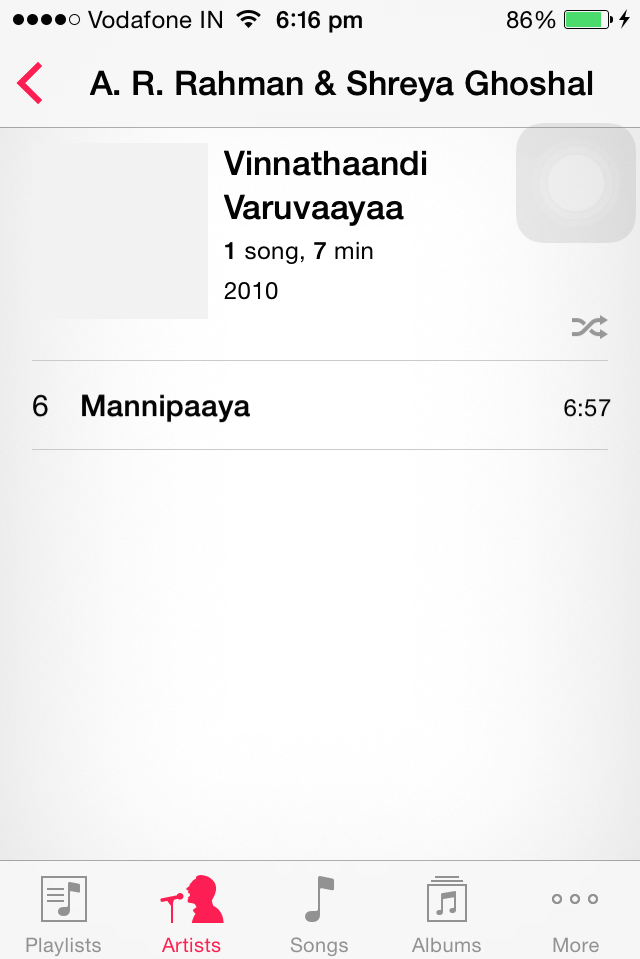
Navigation contollers are quite commonly used in iOS App. Navigation Controllers contain stack of view controllers and provide a drill down approach for accessing the child view controllers. The top bar in a navigation controller is called the navigation bar which normally contains the title of the screen. The navigation bar in child View Controller will have a back button that appears automatically and will take you to Root ViewController.
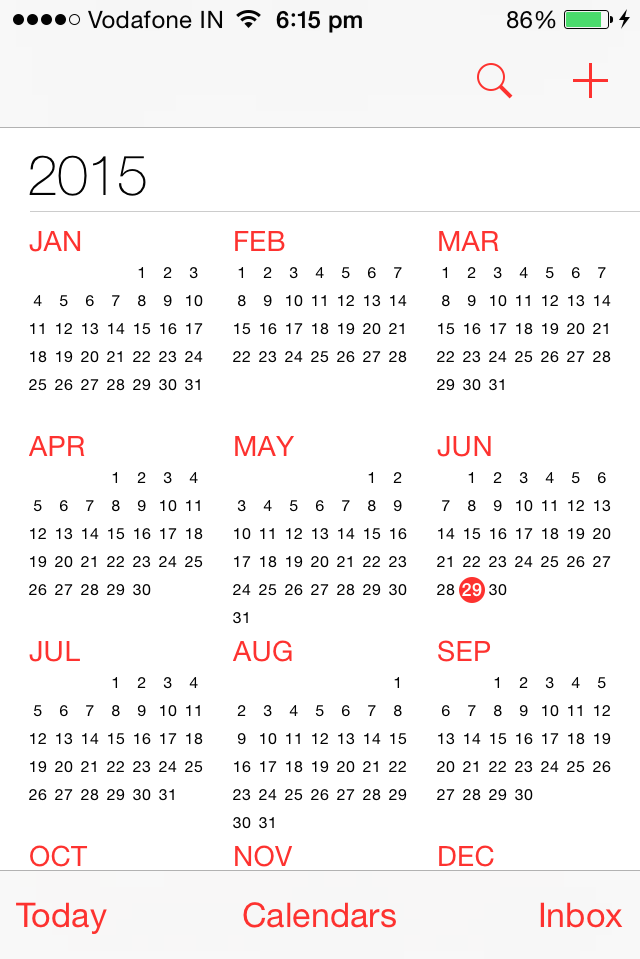
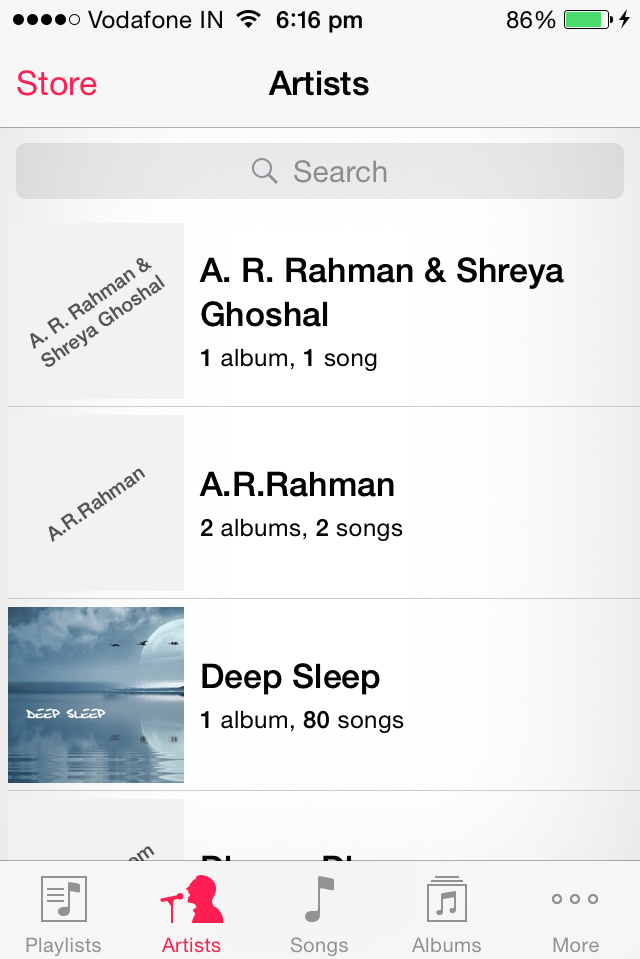
Listed below are screenshots of apps with navigation controller.
Example Apps
Calendar App
Music App
The objective of this Navigation Contorller article is to explain the following
- How to embed ViewController inside Navigation Controller
- Add Title to Navigation Bar
- Creating a Push Segue
- ViewController transitions using Segue and programmatically
- Programmatically dismiss ViewController.
- Add toolbars to navigation controller
Project Setup
Let us see the functioning of navigation controller with an example project. This project displays list of different colours and drill down on each colours will set the background of the ViewController to choosen colour.
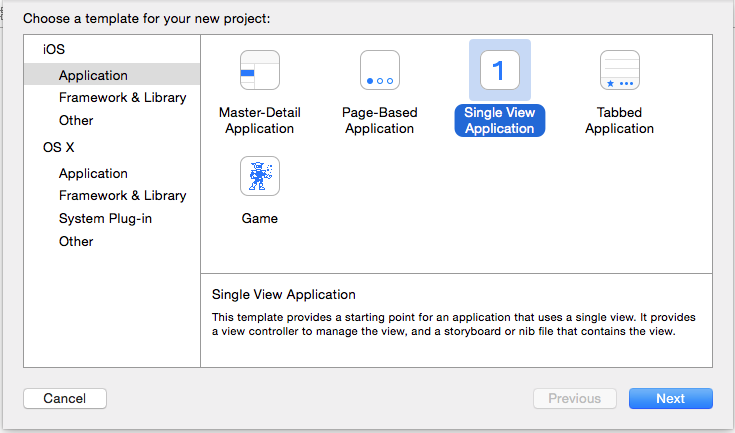
Create a new Xcode project selecting tamplate as Single View Application.
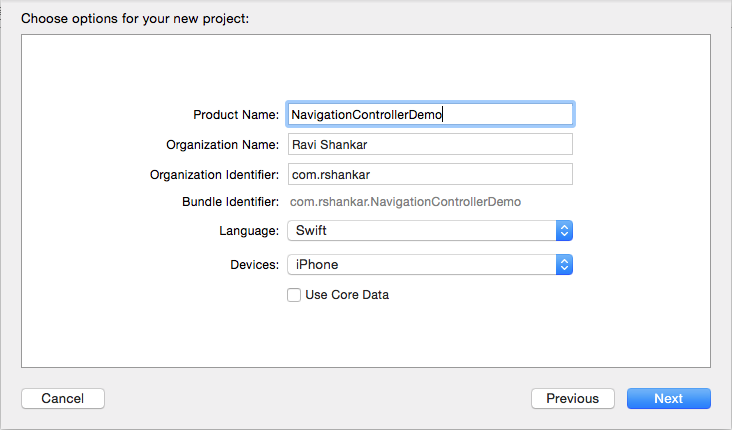
In the Choose options for your new project, select Language as Swift.
Embed ViewController inside Navigation Controller
Navigate to Main.storyboard file in the project navigator and select ViewController. Then unmark the check boxes with caption as Use Auto Layout and Use Size Classes (using File Inspector) as this app is onlye for iPhone and not any other devices,
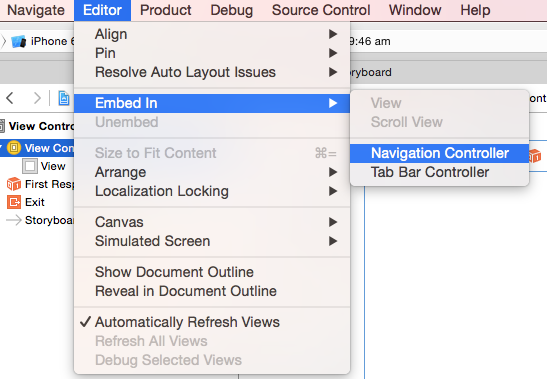
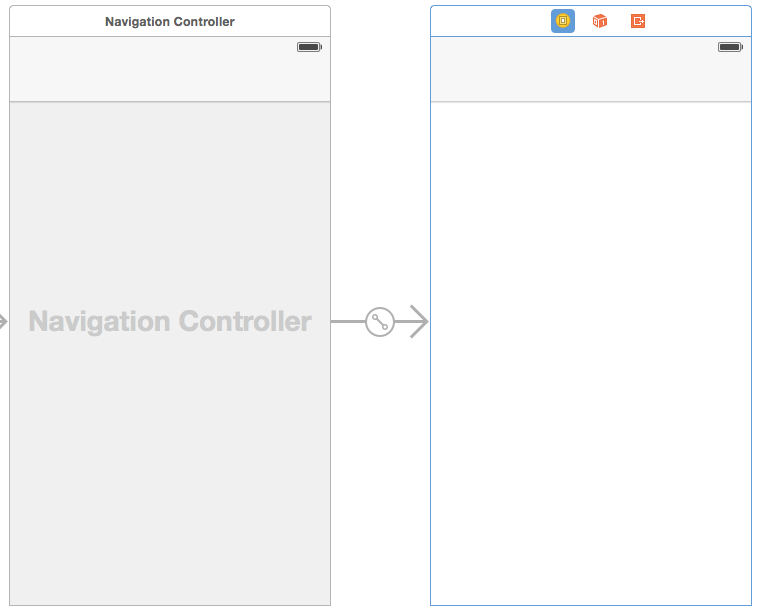
Now embed the ViewContoller inside a navigation contoller by selecting Navigation Contoller option under Editor -> Embed In menu option. The ViewController will be embeded in Navigation Controller as shown below.
Add Colours Enum
Add a new Swift file to the project and name the file and Colours. Open the file for editing and add the following code snippet.
enum Colours: String {
    case Blue = "0000FF"
    case Cyan = "00FFFF"
    case Gold = "FFD700"
    case Green = "008000"
    case Khaki = "F0E68C"
    case Orange = "FFA500"
    case Red = "FF0000"
    case Skyblue = "87CEEB"
    case Tan = "D2B48C"
    case Violet = "EE82EE"

    static let allValues = [Blue,Cyan,Gold,Green,Khaki,Orange,Red,Skyblue,Tan,Violet]

    func getDisplayName() -> String {
        var displayName = ""
        switch (self) {
        case .Blue:
            displayName = "Blue"
        case .Cyan:
            displayName = "Cyan"
        case .Gold:
            displayName = "Gold"
        case .Green:
            displayName = "Green"
        case .Khaki:
            displayName = "Khaki"
        case .Orange:
            displayName = "Orange"
        case .Red:
            displayName = "Red"
        case .Skyblue:
            displayName = "SkyBlue"
        case .Tan:
            displayName = "Tan"
        case .Violet:
            displayName = "Violet"
        }
        return displayName
    }

    static func getColours() -> [String] {
        var colours:[String] = []
        for colour in Colours.allValues {
            colours.append(colour.getDisplayName())
        }
        return colours
    }

    static func getEnumFromSelectedValue(selectedRow: Int) -> Colours{
        var selected:Colours?
        switch (selectedRow) {
        case Colours.Blue.hashValue:
            selected = .Blue
        case Colours.Cyan.hashValue:
            selected = .Cyan
        case Colours.Gold.hashValue:
            selected = .Gold
        case Colours.Green.hashValue:
            selected = .Green
        case Colours.Khaki.hashValue:
            selected = .Khaki
        case Colours.Orange.hashValue:
            selected = .Orange
        case Colours.Red.hashValue:
            selected = .Red
        case Colours.Skyblue.hashValue:
            selected = .Skyblue
        case Colours.Tan.hashValue:
            selected = .Tan
        case Colours.Violet.hashValue:
            selected = .Violet
        default:
            break
        }
        return selected!
    }

    // Credit below function to http://www.anthonydamota.me/blog/en/use-a-hex-color-code-with-uicolor-on-swift/
    static func getUIColorFromHex(colorCode: String, alpha: Float = 1.0) -> UIColor{
        var scanner = NSScanner(string:colorCode)
        var color:UInt32 = 0;
        scanner.scanHexInt(&color)
        let mask = 0x000000FF
        let r = CGFloat(Float(Int(color >> 16) & mask)/255.0)
        let g = CGFloat(Float(Int(color >> 8) & mask)/255.0)
        let b = CGFloat(Float(Int(color) & mask)/255.0)
        return UIColor(red: r, green: g, blue: b, alpha: CGFloat(alpha))
    }
}
In the above code snippet, we have added enum that holds a list of colours and following functions
-
getDisplayName()- Retrieve the Colour name from Enum value getColours()- Returns the list of colours.getEnumFromSelectedValue()- Return enum on based on selected valuegetUIColorFromHex()- returns the UIColor object based on Hex Colour code.
Adding UITableView
In order to display different colours, let us add a UITableView to the ViewController (which is embeded in Navigation Controller). Drag and drop a UITableView from Object library to the ViewController. Then set the datasource and delegate property of the tableview to the ViewController. Add IBOutlet TableView variable and connect it to the UITableView in the Interface Builder. If you find difficulty in following these steps check out UITableView demo in Swift.
Setup data for TableView
Add an instance level variable to the ViewController class for storing data
var data:[String] = [String]()
And in viewDidLoad function add this line data = Colours.getColours() to populate data with the array of colours. Then implement the following UITableViewDataSource methods numberOfRowsInSection and cellForRowAtIndexPath as shown below.
//MARK:- UITableViewDataSource methods

func tableView(tableView: UITableView, numberOfRowsInSection section: Int) -> Int {
    return data.count
}

func tableView(tableView: UITableView, cellForRowAtIndexPath indexPath: NSIndexPath) -> UITableViewCell {
    let cell = tableView.dequeueReusableCellWithIdentifier("CellIdentifier", forIndexPath: indexPath) as! UITableViewCell
    cell.textLabel?.text = data[indexPath.row]
    return cell
}
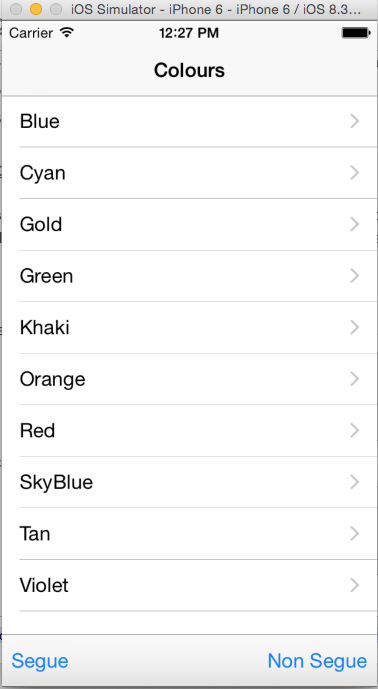
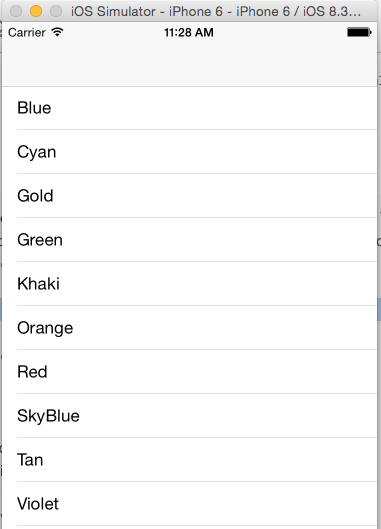
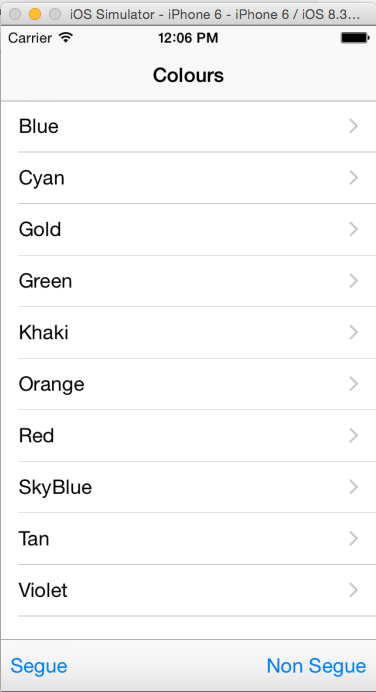
Navigate to Main.storyboard file and add UITableViewCell to the TableView. Make sure to provide identifier for the prototype cell as “CellIdentifier”. Now if you build and run the project you sould see the initial screen with empty navigation bar and with following set of colours
Add Title to Navigation Bar
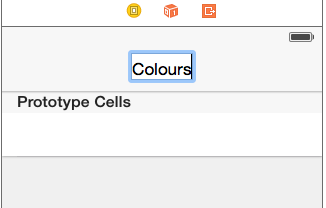
You can use Interface builder to add title to navigation bar by double clicking on the center of the Navigation bar.
And if you want to add title programmatically then use the following code snippet. Place this code snippet in viewDidAppear function.
navigationItem.title = "Colours"
Create Push Segue
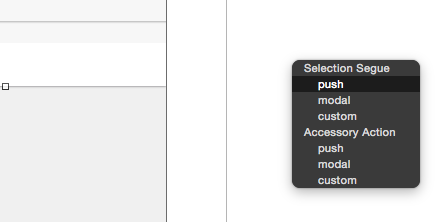
Drag and drop UIViewController from object library on to Storyboard. Now to setup relationship between this View Controller and the ViewController embeded in Navigation Controller you need to create a Push segue. This can be done by selecting the Prototype cell then press Control and drag drop to the new ViewController. Select the type of Segue as Push as shown below.
After creating the push segue relationship, you should notice that the newly added ViewController has a navigation bar at the top. Now if you build and run the project, you should be able to navigate between the ViewControllers (Did you notice the Colours button?).
Change background colour
We need to add the functionality that when a user taps any colour in the Main ViewContorller, the background colour of the child ViewController will be set to the selected colour.
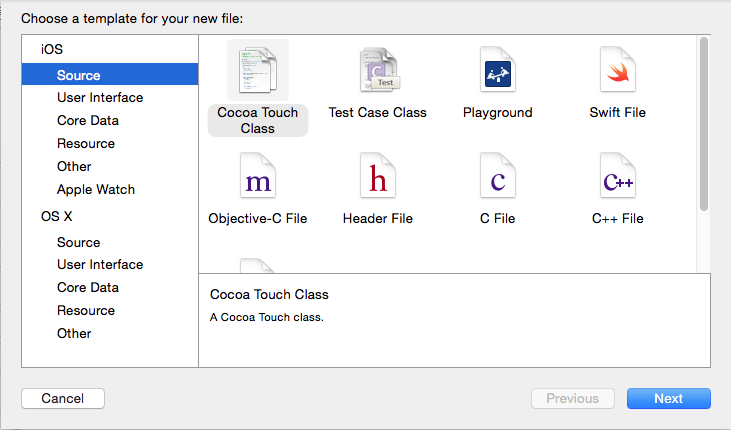
Add a new file and choose the template for your new file as Cocoa Touch Class.
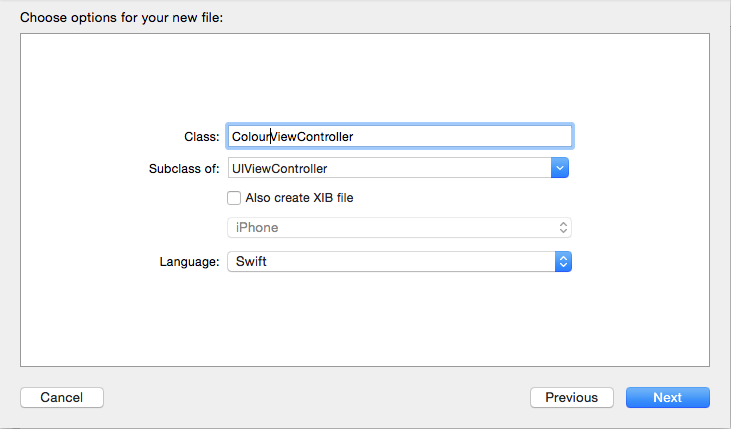
Make the new class as Subclass of UIViewController and provide the name as ColourViewController.swift
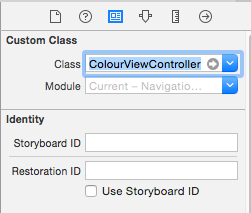
Using the Interface builder, set the class as ColourViewController (Identity Inspector) and also provide the Storyboard ID as ColourViewController
Now add colour property to the ColourViewController and this will hold enum value of the selected colour in the ManiViewController.
var colour: Int?
And in the viewDidLoad function add the following code snippet.
override func viewDidLoad() {
    super.viewDidLoad()

    if let colour = colour {
        let hex:Colours = Colours.getEnumFromSelectedValue(colour)
        view.backgroundColor = Colours.getUIColorFromHex(hex.rawValue, alpha: 1.0)

        navigationItem.title = hex.getDisplayName()
    }
}
The above code snippet retrieves the colour enum and corresponding UIColor by passing the color hex code. This colour is then set as the background colour of the current view. Also the display name of the colour is set as the title for the navigation bar.
Add prepareForSegue funciton
Navigate to back to the ViewController.swift file and add the following prepareForSegue funciton.
//MARK:- PrepareForSegue

override func prepareForSegue(segue: UIStoryboardSegue, sender: AnyObject?) {
    if segue.identifier == "Colour" {
        let colourViewController:ColourViewController = segue.destinationViewController as! ColourViewController
        let selectedRow = tableView.indexPathForSelectedRow()?.row
        colourViewController.colour = selectedRow
    }
}
The above function instantiates the ColourViewContoller from segue.destinationViewController and sets the selected colour form the tableView to the colour property of the ColourViewController.
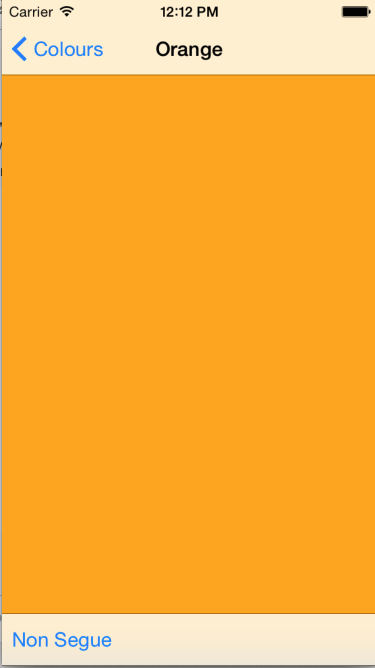
Now if you build and run the app, you should see the list of colours and on selecting any colour shoud take you to the Child ViewController and setting the background colour to the selected colour. Also you should be able to navigate back by tapping the Colours button in the navigation bar.
###
Adding toolbars to Navigation Controllers
Let us see how to programmatically add toolbars to a ViewController embeded in a Navigation Controller. Open ViewController.swift for editing and add the following functions
//MARK:- Add toolbar items
func addToolBarItems() {

    let segue = UIBarButtonItem(title: "Segue", style: .Plain, target: self, action: "segueCall")
    let nonSegue = UIBarButtonItem(title: "Non Segue", style: .Plain, target: self, action: "nonSegueCall")
    let seperator = UIBarButtonItem(barButtonSystemItem: UIBarButtonSystemItem.FlexibleSpace, target: self, action: nil)

    var items = [segue,seperator,nonSegue]

    self.setToolbarItems(items as [AnyObject], animated: true)
    navigationController?.setToolbarHidden(false, animated: true)
}

//MARK:- Segue call
func segueCall(){
    performSegueWithIdentifier("Colour", sender: self)
}

//MARK:- Non Segue call
func nonSegueCall() {
    let childViewController = storyboard?.instantiateViewControllerWithIdentifier("ColourViewController") as! ColourViewController
    navigationController?.pushViewController(childViewController, animated: true)
}
addToolBarItems funciton creates a UIBarButtonItems along with a separator (flexible space). These array of UIBarButtonItems are then added to the ViewController using setToolBarItems function. Also we need to unhide the toolbar in navigation contoller using setToolbarHidden function.
The segueCall function shows how to programmatically call segue transition using performSegueWithIdentifier. The nonSegueCall function is used for ViewController transitions inside navigation controller but without using a Segue. Build and Run the app should now display toolbar at bottom of the ViewController.
Finally we will see how to programmatically dismiss ViewController embeded in navigation controller. Open ColourViewController.swift for editing and add the following piece of code which add a toolbar item and dismiss the ViewController by calling navigationController?.popViewControllerAnimated(true)
//MARK:- Add toolbar items

func addToolBarItems() {

    let nonSegue = UIBarButtonItem(title: "Non Segue", style: .Plain, target: self, action: "nonSegueCall")
    var items = [nonSegue]

    self.setToolbarItems(items as [AnyObject], animated: true)
}

func nonSegueCall() {
    navigationController?.popViewControllerAnimated(true)
}
The above code snippet adds a toolbar item with title as Non Segue. On tapping this button, the ColourViewController will be dismissed and you will be taken back to the Main ViewController.
Tapping on Non Segue should dismiss the Child ViewController and take you to the main ViewController.
Download the source code from here.

