
Updated for Swift 5
In this short tutorial, we will see an example in Swift programming language using UIWebView. The WebView will load a webpage and provide option to refresh, stop, go back and go forward. This tutorial should give a brief overview on how to declare IBAction, IBOutlets and use Objective-C classes (NSURL and NSURLRequest) in Swift


Interface Design
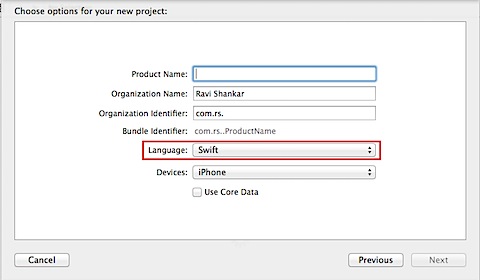
Step 1: Create a Single View Application Project and make sure to select the programming language as Swift

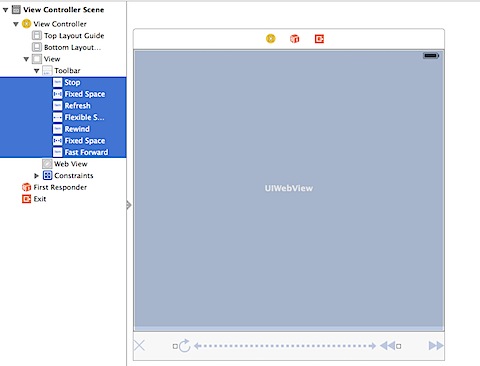
Step 2: Select Main.Storyboard under Project navigator. then drag and drop WebView and Toolbar from Object Library to the View Controller.
Step 3: Now place four bar button items on Toolbar to provide stop, refresh, go back and go forward functionality. You can also use flexible and fixed separators for aligning the bar button items.

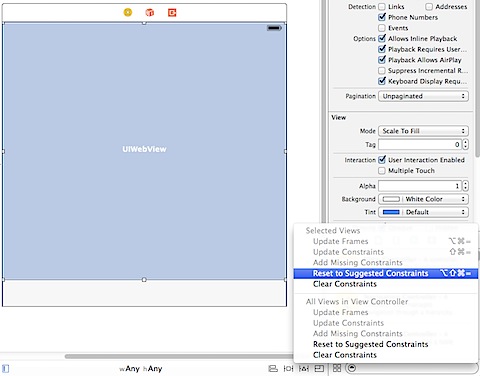
Step 4: Make sure to use the SuggestedConstraints for WebView and Toolbar. You can do this by selecting the controls and using the Reset to Suggested Constraints available as part of Resolve Auto Layout option. This would ensure that the controls gets adjusted automatically depending upon the device’s screen width and height.

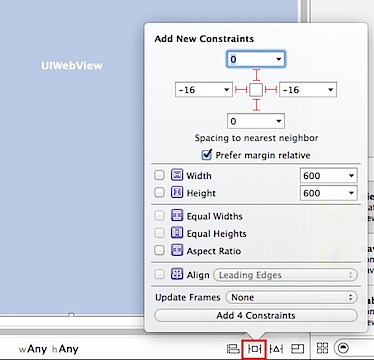
Updated – 28/08/2014
Since some users are facing problems with Reset to Suggested Constraints in Xcode 6 Beta 6, you can use Pin option to define the four constraints using the default values. Then click Add 4 Constraints available at the bottom of the screen.

Write Code
Step 5: Navigate to ViewController.swift file on the Project Navigator. Add the following line after class ViewController: UIViewController which defines the IBOutlet element for WebView.
@IBOutlet var webView: UIWebView!
Then connect this IBOutlet element to the WebView on InterfaceBuilder.
Step 6: In the viewDidLoad function, create URL and NSURLRequest for the webpage and associate this with the WebView by calling loadRequest method.
override func viewDidLoad()
{
  super.viewDidLoad()
  let url = NSURL(string: "https://rshankar.com")
  let request = NSURLRequest(url: url! as URL)
  webView.delegate = self
  activityIndicator.hidesWhenStopped = true
  activityIndicator.startAnimating()
  webView.loadRequest(request as URLRequest)
}
Step 7: Now add the corresponding IBAction methods for the four buttons stop, refresh, go back and go forward. And connect these IBActions to the buttons on Interface builder.
func webViewDidFinishLoad(_ webView: UIWebView)
{
      activityIndicator.stopAnimating()
}

@IBAction func doRefresh(_: AnyObject) {
  webView.reload()
}

@IBAction func goBack(_: AnyObject)
{
   webView.goBack()
}

@IBAction func goForward(_: AnyObject) {
  webView.goForward()
}

@IBAction func stop(_: AnyObject)
{
   webView.stopLoading()
}
Step 8: Compile and run the project by selecting a suitable simulator.
Download the souce code from GitHub.