
UICollectionView Demo in Swift
UICollectionView can be used for displaying set of data in rows and columns The main difference between UICollectionView and UITableView is that CollectionView can be display more than one column. The following topics are covered in this article
- Simple collection view demo
- Displaying data in Collection View
- Implementiing Custom Cell
- Adding Section Headers
- Highlighting Cell
- Insert Cell
- Delete Cells
Project Setup
Create a new project by selecting Single View Application template.

Provide the necessary details in the Project options screen and select the language as Swift.

Adding CollectionView
Let us first try out simple collection view to get a better understanding of how various components works. Then let us move on to a demo that displays various fruits grouped in different section. And you will be able insert and delete cells from the Collection View.
Navigate to Main.storyboard, disable Auto Layout and size classes using File Inspector option.

Then drag and drop CollectionView from object library to ViewController. The ViewController with CollectionView should look as shown below.

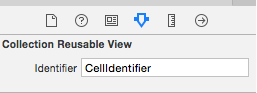
The square box inside collection view is UICollectionViewCell. Using Attributes Inspector, change the background colour of CollectionView to white. Then select UICollecitonViewCell and enter value for identifier as “CellIdentifier”
Using Assistant Editor, add an IBOutlet to CollectionView in ViewController.swlft file.
@IBOutlet weak var collectionView: UICollectionView!
Implement UICollectionViewDataSource methods
When the CollectionView loads, we need to specify the data for the cells. This can be done by implementing
UICollectionViewDataSource related methods. UICollectionViewDataSource protocols defines the following mandatory and optional methods.
protocol UICollectionViewDataSource : NSObjectProtocol {

func collectionView(collectionView: UICollectionView, numberOfItemsInSection section: Int) -> Int

// The cell that is returned must be retrieved from a call to -dequeueReusableCellWithReuseIdentifier:forIndexPath: func collectionView(collectionView: UICollectionView, cellForItemAtIndexPath indexPath: NSIndexPath) -> UICollectionViewCell

optional func numberOfSectionsInCollectionView(collectionView: UICollectionView) -> Int

// The view that is returned must be retrieved from a call to -dequeueReusableSupplementaryViewOfKind:withReuseIdentifier:forIndexPath: optional func collectionView(collectionView: UICollectionView, viewForSupplementaryElementOfKind kind: String, atIndexPath indexPath: NSIndexPath) -> UICollectionReusableView }
First make sure to set the delegate property of collectionView to self in viewDidLoad function. Then add instance level property for storing Cell Identifier.
let identifier = "CellIdentifier"

override func viewDidLoad() {
    super.viewDidLoad()

collectionView.dataSource = self
}
Now add the implementation for mandatory methods numberOfItemsInSection and cellForItemAtIndexOath in ViewController.swlft. We can do this by adding an extension to ViewController class. Add this extension after the closing parenthesis of View Controller class.
// MARK:- UICollectionViewDataSource Delegate
extension ViewController: UICollectionViewDataSource {

func collectionView(collectionView: UICollectionView, numberOfItemsInSection section: Int) -> Int {
    return 12
}

func collectionView(collectionView: UICollectionView, cellForItemAtIndexPath indexPath: NSIndexPath) -> UICollectionViewCell {
    let cell = collectionView.dequeueReusableCellWithReuseIdentifier(identifier, forIndexPath: indexPath) as! UICollectionViewCell
    cell.backgroundColor = UIColor.redColor()

return cell
}
}
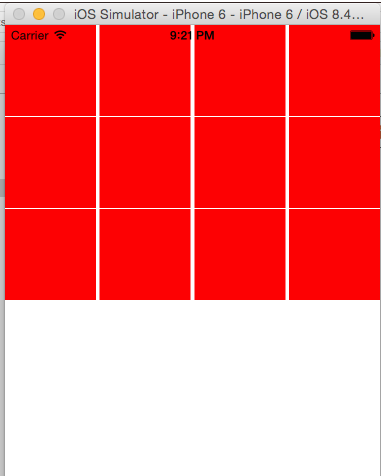
We have temporarily hard coded the number of items to be shown as 12. Using dequeReusableCellWithReuseIdentifier funciton, create cells based on index path. Then change the background color of cell to red. Now when you build and run the project, you should see collection view showing some cells as shown below.

If you want to have 3 rows and 4 columns then use the Collection View’s Size Inspector to make the appropriate changes to Cell Size and Minimum Spacing attributes.
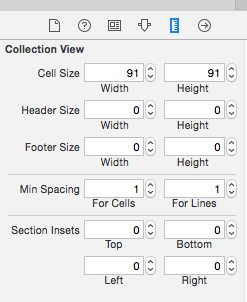
If you Build and Run the project you should notice the changes.
Collection View DataSource
Now for the actual demo project, let us create a seperate class which will act as DataSource. Before creating a datasource, let us create a model class with file name as Fruit.swift. The implementation of the Fruit class should look as shown below
class Fruit {
    var name:String?
    var group:String?

init(name: String, group: String) {
    self.name = name
    self.group = group
}
}
Fruit struct is just a place holder for storing fruit related information. Now create another class for DataSource and name it as DataSource.swift. This class will provide the data related methods to the CollectionView. Durining the initialisation of the class, the data is read from plist and populated to fruits and groups array. Then using the respective helper methods the details will be retrieved by CollectionView.
import Foundation
class DataSource {
init() {
populateData()
}
var fruits:[Fruit] = []
var groups:[String] = []
func numbeOfRowsInEachGroup(index: Int) -> Int {
return fruitsInGroup(index).count
}
func numberOfGroups() -> Int {
return groups.count
}
func gettGroupLabelAtIndex(index: Int) -> String {
return groups[index]
}
// MARK:- Populate Data from plist
func populateData() {
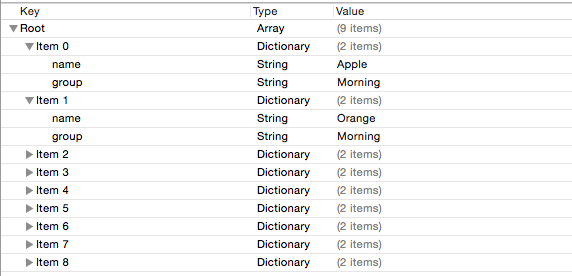
if let path = NSBundle.mainBundle().pathForResource("fruits", ofType: "plist") {
if let dictArray = NSArray(contentsOfFile: path) {
for item in dictArray {
if let dict = item as? NSDictionary {
let name = dict["name"] as! String
let group = dict["group"] as! String
let fruit = Fruit(name: name, group: group)
if !contains(groups, group){
groups.append(group)
}
fruits.append(fruit)
}
}
}
}
}
// MARK:- FruitsForEachGroup
func fruitsInGroup(index: Int) -> [Fruit] {
let item = groups[index]
let filteredFruits = fruits.filter { (fruit: Fruit) -> Bool in
return fruit.group == item
}
return filteredFruits
}
}
Then add the required images to Images.xcassets, you can download the images for this project from GitHub.
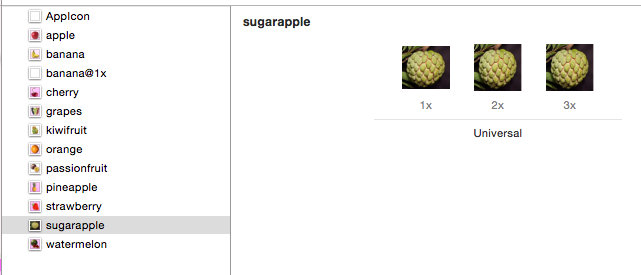
Also add/create a new plist file which contains the information about the fruits and the group they belong to (download it from here).
Add Custom CollectionViewCell
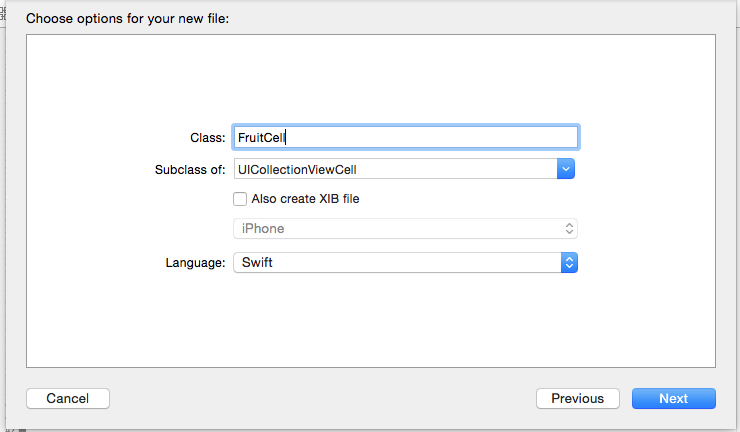
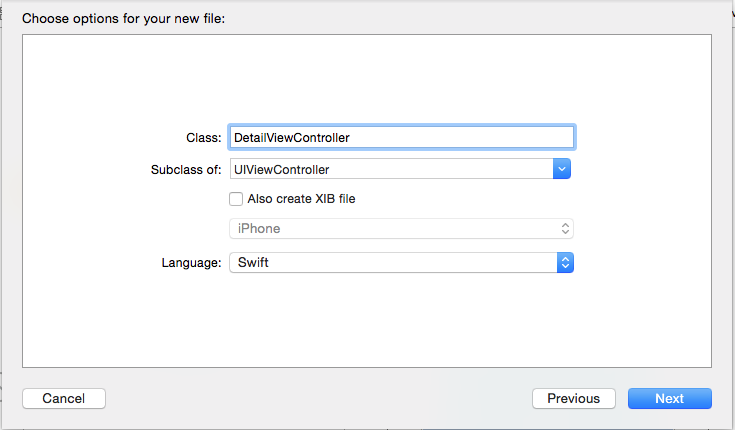
For displaying image and caption in Collection View Cell, create a Custom Cell subclass of UICollectionViewCell. Provide name for the new file as Fruit Cell.

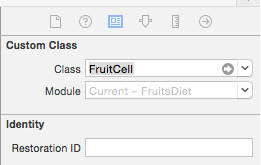
Navigate to Main.storyboard, select CollectionViewCell and using identity inspector set the class as FruitCell.
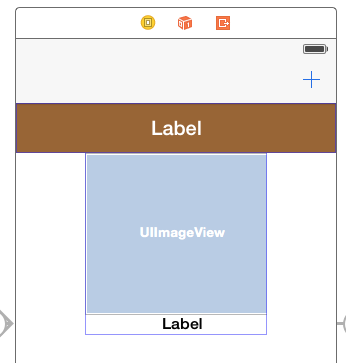
Drag and drop UIImageView and Label on to CollectionViewCell and add corresponding IBOutlets to FruitCell class.
import UIKit

class FruitCell: UICollectionViewCell {

@IBOutlet weak var caption: UILabel!
@IBOutlet weak var imageView: UIImageView!
}
Display Data
We need to make changes to the ViewController extension for displaying the data form the DataSource with CustomCell. First Create an instance variable for DataSource in ViewController class
let dataSource = DataSource()
Then make the following changes to UICollectionViewDataSource extension to reflect the DataSource and FruitCell classes.
extension ViewController : UICollectionViewDataSource {

func numberOfSectionsInCollectionView(collectionView: UICollectionView) -> Int {
    return dataSource.groups.count
}

func collectionView(collectionView: UICollectionView, numberOfItemsInSection section: Int) -> Int {
    return dataSource.numbeOfRowsInEachGroup(section)
}

func collectionView(collectionView: UICollectionView, cellForItemAtIndexPath indexPath: NSIndexPath) -> UICollectionViewCell {
    let cell = collectionView.dequeueReusableCellWithReuseIdentifier(identifier,forIndexPath:indexPath) as! FruitCell

let fruits: [Fruit] = dataSource.fruitsInGroup(indexPath.section)
    let fruit = fruits[indexPath.row]

let name = fruit.name!

cell.imageView.image = UIImage(named: name.lowercaseString)
    cell.caption.text = name.capitalizedString

return cell
}
}
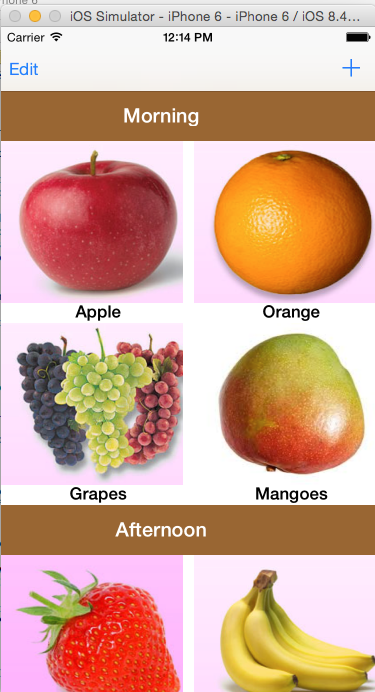
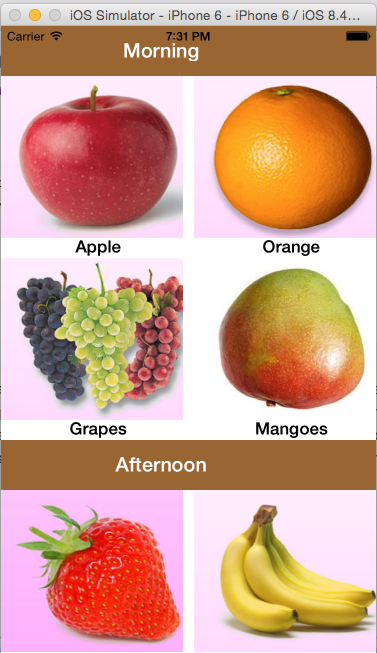
Now if you build and run the project, you should see the colleciton view displaying fruits along with the caption.

The rows and columns are not properly aligned, we can fix this calculate the size of the cell based on height and width of collection view. Let us make the Collection View to display 2 cells per row. Navigate to Main,storyboard, update the Cell Size property to 182 as shown below.
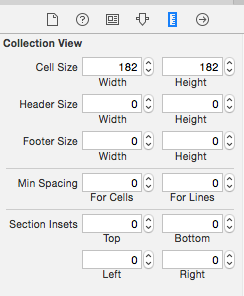
Make sure to adjust the UIImageView and Label to fit the changed Collection View cell size. Now if you compile and run the project, the simulator should look as shown below.
Add Section Header
Headers for each can be added by implementing the viewForSupplementaryElementOfKind method defined as part of UICollectionViewDataSource protocol. We already have function in DataSource class that returns caption for each section. Let us add new Custom class for CollectionView section header and map this class to the header view in Interface builder.
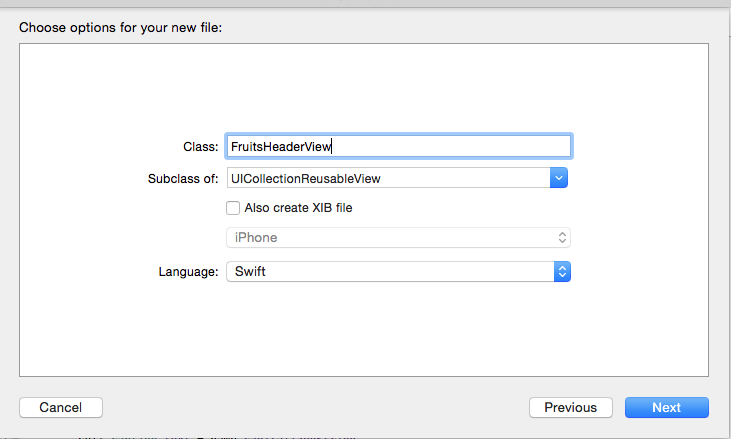
Create FruitsHeaderView with subclass as UICollectionResuableView. Then navigate to Main.storyboard, select Collection View -> Attributes Inspector and enable Section Header under Accessories.

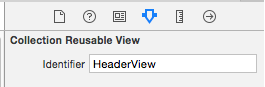
Now select the Section Header in the Collection View and set the class as FruitsHeaderView using Identity Inspector. In the Attributes Inspector enter the Identifier as HeaderView

Add UILabel to the header view to display the seciton title and corresponding IBOutlet to FruitsHeaderView class. You can also provide some background colour for the HeaderView,

import UIKit

class FruitsHeaderView: UICollectionReusableView {
    @IBOutlet weak var sectionLabel: UILabel!
}
Now add the following viewForSupplementaryElementOfKind implementation to the UICollectionViewDataSource extension in ViewController class.
func collectionView(collectionView: UICollectionView, viewForSupplementaryElementOfKind kind: String, atIndexPath indexPath: NSIndexPath) -> UICollectionReusableView {

let headerView: FruitsHeaderView = collectionView.dequeueReusableSupplementaryViewOfKind(kind, withReuseIdentifier: headerViewIdentifier, forIndexPath: indexPath) as! FruitsHeaderView

headerView.sectionLabel.text = dataSource.gettGroupLabelAtIndex(indexPath.section)
    return headerView
}
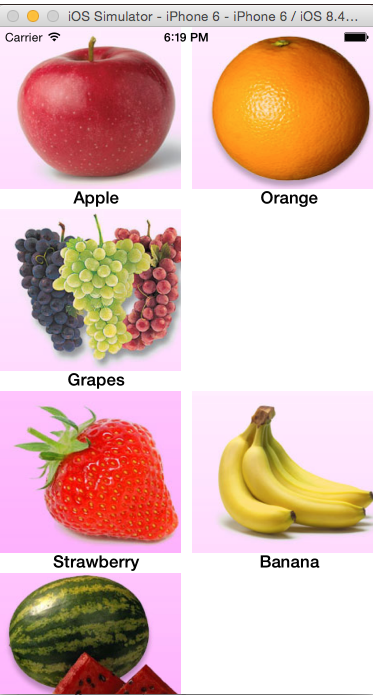
Make sure to add an instance variable let headerViewIdentifier = “HeaderView” in ViewController.class. In viewForSupplementaryElementOfKind function, we are creating an instance of FruitsHeaderView class using dequeueReusableSupplementaryViewOfKind function. Then set the section label by retrieving the caption from DataSource class. Build and run the app on iPhone simulator should show the following
Add Detail View
Now to add a detail View, let us first embed the ViewController in Navigation Controller. Then add another ViewController for using it as Detail View. Create a segue by Control + drag from CollectionView Cell to the new View Controller and select the Segue as Push.

Add UIImageView to the DetailViewController and centre align it to the View. Then add a new class (sub class of UIViewController) and name the file as DetailViewController
Map this class to the Second View Controller in the Interface builder. Then add the IBOutlet for the UIImageView in DetailViewController class.
@IBOutlet weak var imageView: UIImageView!
From the main View Controller, the selected Fruit needs to be passed to the DetailViewController class. Add a new property which is of type Fruit
var fruit: Fruit?
In viewDidLoad method, add code to populate the title and image.
if let fruit = fruit {
    navigationItem.title = fruit.name?.capitalizedString
    imageView.image = UIImage(named: fruit.name!.lowercaseString)
}
Navigate to ViewController.class and implement the prepareForSegue and getIndexPathForSelectedCell function.
// MARK:- prepareForSegue
override func prepareForSegue(segue: UIStoryboardSegue, sender: AnyObject?) {
    // retrieve selected cell & fruit
    if let indexPath = getIndexPathForSelectedCell() {
        let fruit = dataSource.fruitsInGroup(indexPath.section)[indexPath.row]
        let detailViewController = segue.destinationViewController as! DetailViewController
        detailViewController.fruit = fruit
    }
}

func getIndexPathForSelectedCell() -> NSIndexPath? {
    var indexPath:NSIndexPath?
    if collectionView.indexPathsForSelectedItems().count > 0 {
        indexPath = collectionView.indexPathsForSelectedItems()[0] as? NSIndexPath
    }
    return indexPath
}
In the above function using the selected Item indexPath the corresponding fruit is retrieved from DataSource class. Then this information is passed to the DetailViewController.

Highlight Selection
When the user taps any cell, it would nice to see the cell getting highlighted. This can be done by implementing following function as extension.
// MARK:- UICollectionViewDelegate Methods

extension ViewController : UICollectionViewDelegate {
    func collectionView(collectionView: UICollectionView, didSelectItemAtIndexPath indexPath: NSIndexPath) {
        highlightCell(indexPath, flag: true)
    }
}
func collectionView(collectionView: UICollectionView, didDeselectItemAtIndexPath indexPath: NSIndexPath) {
    highlightCell(indexPath, flag: false)
}
}
Also make sure to add the collectionView.delegate = self to viewDidLoad function. Then add the following highlight function inside ViewController class.
// MARK:- Highlight
func highlightCell(indexPath : NSIndexPath, flag: Bool) {

let cell = collectionView.cellForItemAtIndexPath(indexPath)

if flag {
    cell?.contentView.backgroundColor = UIColor.magentaColor()
} else {
    cell?.contentView.backgroundColor = nil
}
}
Since we want to dehighlight the cell when the user returns from the DetailViewController. implement the viewDidAppear function with de-hightlight functionality.
override func viewDidAppear(animated: Bool) {
    super.viewDidAppear(true)

if let indexPath = getIndexPathForSelectedCell() {
    highlightCell(indexPath, flag: false)
}
}
Insert Cell
CollectionView provides insertItemsAtIndexPath method for adding new cell to CollectionView. Navigate to Main.storyboard, add new BarButtonItem to ViewController and set the Identifier as Add.

Add an IBAction to ViewController class and map it to the Add button. In the DataSource class add the following function which inserts new item to fruit model and returns the index.
// MARK:- Add Dummy Data
func addAndGetIndexForNewItem() -> Int {
    let fruit = Fruit(name: "SugarApple", group: "Morning")
    let count = fruitsInGroup(0).count
    let index = count > 0 ? count - 1 : count
    fruits.insert(fruit, atIndex: index)
    return index
}
Then modify the addNewItem IBAction method with the following piece of code.
// MARK:- Add Cell
@IBAction func addNewItem(sender: AnyObject) {
    let index = dataSource.addAndGetIndexForNewItem()
    let indexPath = NSIndexPath(forItem: index, inSection: 0)
    collectionView.insertItemsAtIndexPaths([indexPath])
}
Delete Cell
Add Edit button to the navigation bar to allow users to perform delete operation. This can be done by adding the following line in viewDidLoad method.
navigationItem.leftBarButtonItem = editButtonItem()
Then add a toolbar with button to delete the selected cell. Navigate to Main.storyboard, drag and drop toolbar on to View Controller. Add a BarButtonItem to the toolbar and select the identifier as Trash.

This toolbar should be displayed when the user taps on Edit button. Create an IBOutlet for the toolbar and add the following line to the viewDidLoad method.
toolBar.hidden = true
Implement the setEditing function to enable or disable editing operation. In the below function, when editing is enabled, users will be allowed to select and delete multiple cells. The toolbar will be displayed or hidden based on editing flag.
// MARK:- Editing
override func setEditing(editing: Bool, animated: Bool) {
    super.setEditing(editing, animated: animated)
    collectionView?.allowsMultipleSelection = editing
    toolBar.hidden = !editing
}
Now hook up Trash button in the Interface builder to IBAction for performing the delete operation. Add the following code snippet to deleteCells IBAction method. This first retrieves the indexpath for all the selected items. Then iterates through the indexpaths and to get the list of fruits to be deleted from model.
@IBAction func deleteCells(sender: AnyObject) {

var deletedFruits:[Fruit] = []

let indexpaths = collectionView?.indexPathsForSelectedItems()

if let indexpaths = indexpaths {

for item in indexpaths {
    let cell = collectionView!.cellForItemAtIndexPath(item as! NSIndexPath)

collectionView?.deselectItemAtIndexPath(item as? NSIndexPath, animated: true)
    // fruits for section
    let sectionfruits = dataSource.fruitsInGroup(item.section)
    deletedFruits.append(sectionfruits[item.row])
}

dataSource.deleteItems(deletedFruits)

collectionView?.deleteItemsAtIndexPaths(indexpaths)
}
}
And in the DataSource class, add a function to delete fruits from the model. Also add an extension to array to get the index of the object based on the selected item (This will not be needed in Swift 2.0).
// MARK:- Delete Items
func deleteItems(items: [Fruit]) {

for item in items {
    // remove item
    let index = fruits.indexOfObject(item)
    if index != -1 {
        fruits.removeAtIndex(index)
    }
}
}
We need to cancel the segue operation when the edit operation is enabled, you can do this by implementing the following method in ViewController class.
// MARK:- Should Perform Segue
override func shouldPerformSegueWithIdentifier(identifier: String?, sender: AnyObject?) -> Bool {
    return !editing
}
Download the source code from here
Need iOS Help?
I help developers and founders with:
- New apps — idea to App Store
- Bug fixes, debugging & rescue
- App Store rejections
- Code review & mentoring
10+ years iOS • 10+ published apps • 11,000+ students trained