Tips & Tricks - Tables in Word 2013 & 2010
Listed below are some of the tips which will quite handy when you are working with tables in Word 2013 & 2010
Change the table style in Word
This tutorial is about the table styles option that is available in Word 2013 & 2010. Users can choose a table style using the options available as part of Table Tools –> Design menu.
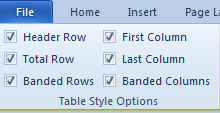
The table styles are filtered based on the Table Style Options like
Header Row – A special style is provided for the first row of the table.
First Column – A special formatting is provided for the first column of the table.
Total Row - A special style is provided for the last row of the table.
Last Column - A special formatting is provided for the last column of the table.
Banded Rows – Banded rows are displayed with special formatting.
Banded Columns – Banded columns are displayed with special formatting.
You can choose a table style from the list box and to see more styles click the drop down.
The table style drop down also has option for clearing style, modifying style and defining new styles.
Repeat table rows at the top of each page in Document
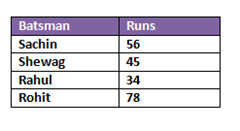
Microsoft Word 2013 & Word 2010 have a feature which allows users to repeat the headers row along with the individual rows at the top of each page. Let us say you have requirement to repeat the following set of rows along with the header rows.
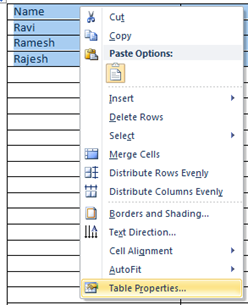
You can do this by selecting the Individual rows along with the header row then right click and pick Table Properties from the list of menus.
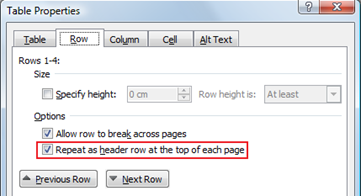
In the Table Properties window, navigate to Row tab and the mark the check box with label as Repeat as header row at the top of each page. Click OK to confirm and save the changes.
Convert list of words in to a table in Microsoft Word
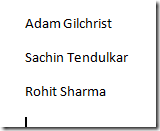
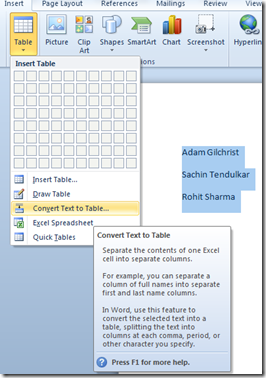
In Microsoft Word you can convert list of text in to a table using the Convert text to table option. For example, to create a table for the following first and last names use the Covert Text to Table option available in Word 2013 and Word 2010.
Listed below are the steps to to convert text to table in Word 2013 and Word 2010
Select the these names and click on the Insert menu –> Insert Table –> Convert Text to Table from menu list
In the Convert Text to table window, set the Number of columns to 2 set the Separate text at to Other option and enter a single space in the text box adjacent to Other label. This would ensure that words after space would be treated as separate column.
Click Ok to complete the process. This would convert the text to a table as shown below
[embed height=”315” width=”560”]http://www.youtube.com/embed/P6083IDu8Is[/embed]
Remove table and keep text in Word
Word 2013 & 2010 has a feature that allows users to remove the table borders but keep the contentwithin in the table. Let us see this with an example table data.
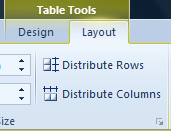
Select the table and navigate to the Layout menu under Table Tools.
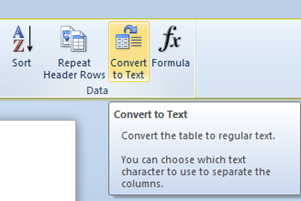
In the Layout Menu, click Convert to Text option available as part of the Data section.
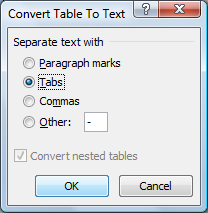
Select how you want to separate the text in the Convert Table to Text window.
Selecting Tabs option would separate text with Tabs and will be displayed as shown below.
Split table horizontally in Word
Microsoft Word 2013 & 2010 have option that allows users to split table horizontally. This is quite useful when you have a larger table and want to divide them in to smaller tables. In this tutorial, we are going to see the steps to split table in a word document
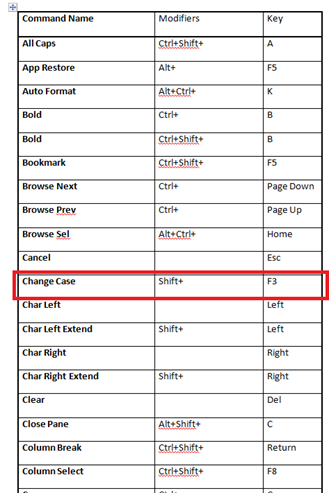
Let us take the following example table (Download Word 2010 Keyboard shortcuts)
Now if you want to split the table in to two from the Change Case row, then place the cursor in Change Case row and navigate to Layout menu. Click the Split table option under the Merge section
This would divide the table horizontally in to two parts as shown below.
You can apply this technique to any table in Microsoft Word that has more than one row.

