
Test Driven Development in Swift
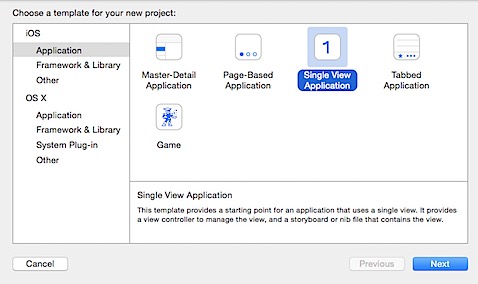
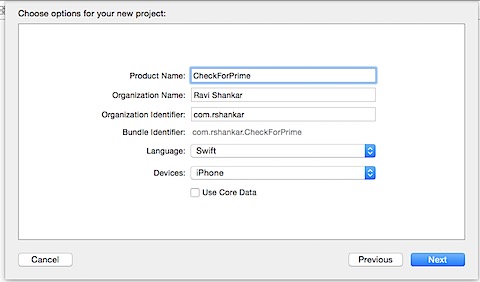
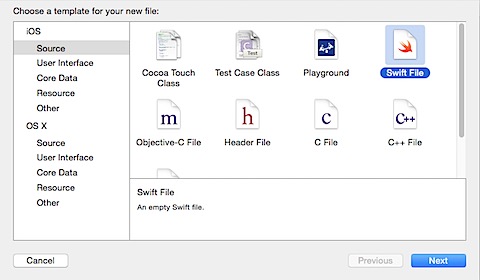
Here is a beginner tutorial on TDD in Swift by writing a program that checks for a prime number. Let us start by creating a new project, selecting template as Single View Application. Though we won’t be adding anything to the storyboard as we will focus only on the business logic.
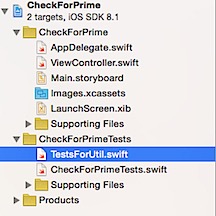
After creating the project, the project navigator should have the following structure.

from wikipedia
A prime number is a natural number greater than 1 that no positive divisors other than 1 and itself. - 2,3,5,7,11,13 ….
So now that we know the first prime number is 2, let us add a unit test that checks if number 2 is a prime number. We are going to have a new class called Util that will have the required function to check if a number is prime number. Before creating a Util class, create unit test class called TestsForUtil.swift.
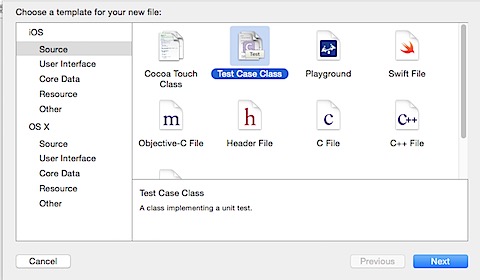
Select the template as Test Case Class and go with the default settings. Now you should see the newly added class as part of the project navigator under CheckForPrimeTests.
As we don’t need CheckForPrimeTests.Swift, we can delete the file. And on opening TestsForSwift.swift, you should notice the following default test methods. setup(), tearDown(), testExampe(), testPerformanceExample(). In this demo, we are not going to use any of these methods and so you can remove them as well.
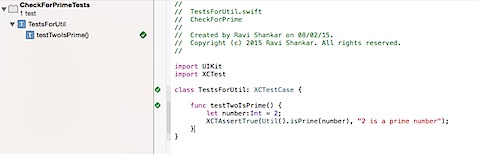
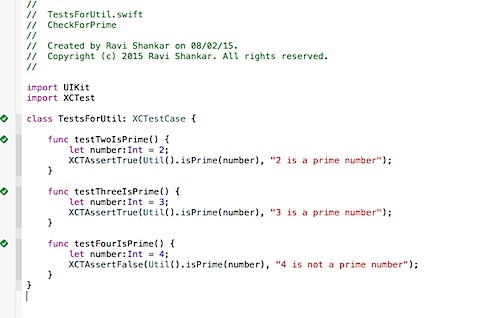
Let us add our first unit test that checks if number 2 is prime number. Add the following method,
func testTwoIsPrime() {
let number:Int = 2;
XCTAssertTrue(Util().isPrime(number), “2 is a prime number”);
}
You should see use of Unresolved identifier “Util as we are yet to add the class.
In TDD we write the tests first and then add the required functionality. Test Driven Development will ensure that you add only required code to pass your tests.
What this test function does is, it calls isPrime function in Util and receives if a boolean on whether the entered number is prime number. This unit test will show Pass status when the value received from isPrime is true.
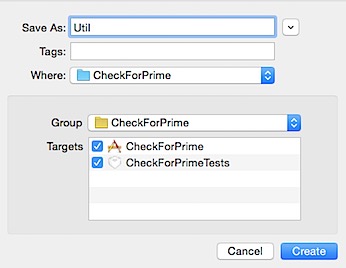
Now add a Swift file with name as Util and make sure to select CheckForPrimeTests under Targets. This would ensure you can call functions written in Util class
Create a public class with name as Util and add function isPrime as shown below.
public class Util {
func isPrime(number:Int) -> Bool {
return number == 2
}
}
All we are doing here is to make sure the function validates number 2. Now executing unit test should show a green tick mark as shown below.
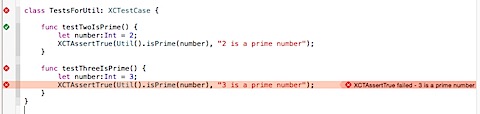
Navigate back to TestsForUtil.swift and add second tests which checks for number 3.
func testThreeIsPrime() {
let number:Int = 3;
XCTAssertTrue(Util().isPrime(number), “3 is a prime number”);
}
On executing this test you should notice failure message as we have hard coded isPrime function to work only for 2.
And to make this test pass, we are going to check for 2 and 3 in isPrime function.
func isPrime(number:Int) -> Bool {
| return (number == 2) | (number == 3) |
}
Let us add the unit test that checks for 4 which is not a prime number.
func testFourIsPrime() {
let number:Int = 4;
XCTAssertFalse(Util().isPrime(number), “4 is not a prime number”);
}
We have used XCTAssertFalse as we are expecting isPrime to return false. This test would pass with out making any changes to isPrime function.
Now let us add out next test case that checks for number 11.
func testElevenIsPrime() {
let number:Int = 11;
XCTAssertTrue(Util().isPrime(number), “11 is a prime number”);
}

We need to make changes to isPrime function so it returns true for number 11. But we cannot just keeping on hardcoding the numbers. So let us change the logic to handle all the prime numbers.
func isPrime(number:Int) -> Bool {
var primeFlag:Bool = true
| if ((number == 2) | (number == 3)) { |
return primeFlag
}
if (number > 3) {
for index in 2…number-1 {
if (number % index == 0) {
primeFlag = false
break
}
}
}
return primeFlag
}
The above function would validate all prime and not a prime numbers and test written for number 11 should pass. Now you can write some tests for prime and not a prime number. For not a prime number make sure to use XCTAssertFalse.
func testThirtyOneIsPrime() {
let number:Int = 31;
XCTAssertTrue(Util().isPrime(number), “31 is a prime number”);
}
func testFiftyIsPrime() {
let number:Int = 50;
XCTAssertFalse(Util().isPrime(number), “50 is not a prime number”);
}
Now let us check this logic for a negative number say -1. Negative numbers are not prime number so isPrime function should handle this. But this test would fail as we don’t have any check for negative numbers.
func testMinusOneIsPrime() {
let number:Int = -1;
XCTAssertFalse(Util().isPrime(number), “-1 is not a prime number”);
}
Making a minor modifications to isPrime function should pass the test.
func isPrime(number:Int) -> Bool {
var primeFlag:Bool = true
| if ((number == 2) | (number == 3)) { |
return primeFlag
}
if (number > 3) {
for index in 2…number-1 {
if (number % index == 0) {
primeFlag = false
break
}
}
} else {
primeFlag = false
}
return primeFlag
}
And the test navigator in Xcode should show status for all your tests.
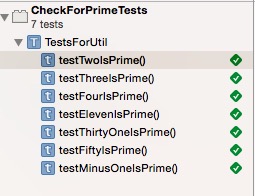
The logic used in isPrime function can be improved and you can probably do that as your exercise. And make sure all the unit tests have green tick mark after changing isPrime function.
Download the source code from here.